
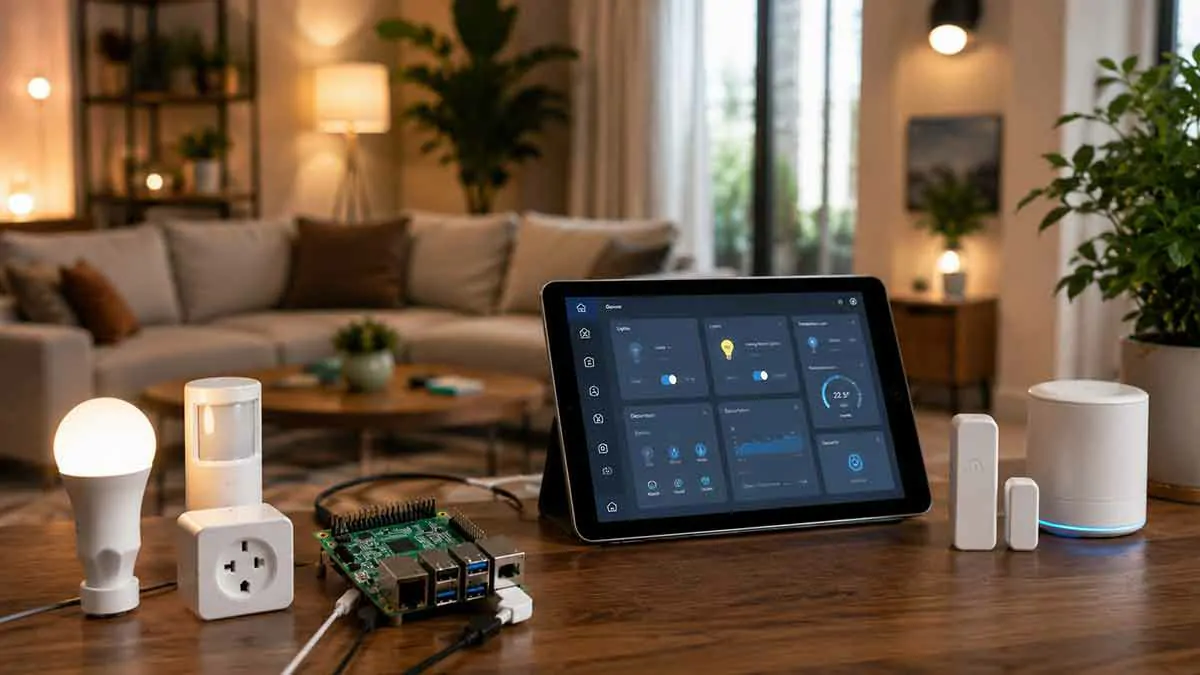
Raspberry Pi home automation is a popular way to build a flexible smart home system without relying entirely on proprietary hubs or separate apps for every device.
A Raspberry Pi is a small, low-power computer that can run home automation software continuously. With the right setup, it can become the central controller for smart lights, sensors, thermostats, plugs, security devices, energy monitoring, and other connected products.
One of the most popular approaches is running Home Assistant on a Raspberry Pi. Home Assistant provides a central interface for integrating devices and creating automations, while the Raspberry Pi provides the hardware on which the system runs.
For beginners, the combination can offer an affordable way to learn about home automation while keeping considerable control over the system.
What Is Raspberry Pi Home Automation?
Raspberry Pi home automation means using a Raspberry Pi computer as part of a system that monitors and controls smart home devices.
The Raspberry Pi itself does not automatically make ordinary appliances smart. Instead, it acts as a computing platform for software that communicates with compatible devices.
A typical setup might look like this:
Raspberry Pi → Home automation software → Smart devices
For example:
Motion sensor → Home Assistant → Smart light
When the sensor detects movement, the automation software can instruct the light to turn on.
A more advanced setup could involve several devices:
Door sensor → Home Assistant → Lights + notification + camera action
The exact capabilities depend on the software, integrations, and devices you choose.
Why Use a Raspberry Pi for Home Automation?
A Raspberry Pi can be attractive because it is small, relatively energy efficient, and flexible.
Instead of purchasing a dedicated hub for each device ecosystem, you can use one computer as the foundation for a broader home automation system.
Some of the main advantages include:
- Flexible software options
- Support for many smart home integrations
- Low power consumption
- Compact size
- Local processing possibilities
- Extensive community resources
- Room for gradual expansion
Raspberry Pi 4 and Raspberry Pi 5 are currently supported options for installing Home Assistant, with Home Assistant recommending at least 2 GB of RAM for this use case.
What Can You Automate With a Raspberry Pi?
Once appropriate software and compatible devices are connected, a Raspberry Pi-based system can automate many parts of a home.
Examples include:
- Smart lighting
- Heating and cooling
- Smart plugs
- Motion sensors
- Door and window sensors
- Security notifications
- Cameras
- Energy monitoring
- Smart locks
- Fans
- Irrigation
- Media devices
- Environmental sensors
The Raspberry Pi is particularly useful when you want several different device types to work together.
Home Assistant on Raspberry Pi
Home Assistant is one of the most common software choices for Raspberry Pi home automation.
It is an open-source home automation platform that runs on hardware in your home rather than requiring the entire system to be hosted in the cloud. Home Assistant recommends Home Assistant OS as the easiest installation type for most users who bring their own Raspberry Pi.
With Home Assistant, you can connect compatible devices, create dashboards, and build automations through a graphical interface.
You can start with a very simple system and gradually add more devices as you become comfortable with the platform.
Which Raspberry Pi Should You Use?
For a beginner Home Assistant installation, Raspberry Pi 4 and Raspberry Pi 5 are the most relevant options.
Home Assistant’s current Raspberry Pi installation guide recommends:
- Raspberry Pi 4 or Raspberry Pi 5
- At least 2 GB of RAM
- Appropriate power supply
- microSD card
- Ethernet connection for installation
Raspberry Pi 5 is the newer and more powerful option.
Its official specifications include a 2.4 GHz quad-core 64-bit Arm processor, Gigabit Ethernet, dual-band Wi-Fi, Bluetooth 5.0/BLE, and PCIe 2.0 connectivity. It is available with several memory capacities.
For a new purchase, Raspberry Pi 5 is an attractive option when the additional performance is useful. If you already own a suitable Raspberry Pi 4, there is generally no need to replace it simply to start Home Assistant.
Raspberry Pi Home Automation Hardware
A basic Raspberry Pi home automation setup does not require a large amount of hardware.
You typically need:
Raspberry Pi
Use a Raspberry Pi 4 or 5 with enough memory for your intended setup.
Power Supply
Use a power supply appropriate for your specific Raspberry Pi model.
Home Assistant specifically warns against relying on unsuitable mobile chargers or computer USB ports because they may not provide adequate power.
Storage
Home Assistant can be installed on a microSD card.
For a Raspberry Pi installation, Home Assistant recommends a card of at least 32 GB and prefers an Application Class 2, or A2, card for better small read/write performance.
Network Connection
Ethernet is recommended for the initial installation and is generally preferable for a permanent home automation server because it provides a more stable connection than Wi-Fi.
Smart Devices
You then add the devices you want to automate.
Start with a few devices rather than trying to automate the entire house immediately.
Installing Home Assistant on Raspberry Pi
The easiest beginner route is Home Assistant OS.
Home Assistant currently recommends Home Assistant OS for most users who install the platform on a Raspberry Pi because it includes the operating system and Home Assistant components in an integrated installation.
The basic process is:
- Install Raspberry Pi Imager on your computer.
- Insert the microSD card.
- Select Home Assistant from the appropriate home automation operating systems.
- Choose the image for Raspberry Pi 4 or Raspberry Pi 5.
- Select the microSD card.
- Write the image.
- Insert the card into the Raspberry Pi.
- Connect Ethernet.
- Connect the appropriate power supply.
- Open Home Assistant from a browser.
Home Assistant’s current Raspberry Pi instructions use Raspberry Pi Imager and provide the Home Assistant OS images for supported Raspberry Pi models.
Accessing Home Assistant
After the Raspberry Pi starts, Home Assistant should become available on your local network.
The official Raspberry Pi installation guide says that you can normally access it through:
homeassistant.local:8123
If that address does not work, you may need to use the Raspberry Pi’s local IP address instead.
Once the interface loads, you can complete the initial onboarding process and begin adding integrations.
Adding Smart Devices
After installing Home Assistant, the next step is connecting your devices.
Home Assistant uses integrations to connect devices and services to the platform.
Depending on the product, a device may connect through:
- Wi-Fi
- Ethernet
- Bluetooth
- Zigbee
- Z-Wave
- Thread
- Matter
- A manufacturer’s cloud service
The best approach is to check the device’s Home Assistant integration before buying it.
Do not assume that a product will expose every feature simply because it is advertised as compatible with a general smart home platform.
Raspberry Pi and Wi-Fi Devices
Wi-Fi smart devices can connect to Home Assistant through your existing home network.
This is convenient because you may not need an additional radio or dedicated hub.
However, adding a large number of Wi-Fi devices can increase the importance of having a reliable wireless network.
For larger smart homes, consider:
- Router placement
- Wi-Fi coverage
- Network capacity
- Separate access points where appropriate
- Ethernet for stationary infrastructure
The Raspberry Pi itself can use Wi-Fi, but Ethernet is generally preferable when the device will run continuously as the central automation server.
Raspberry Pi and Zigbee
Zigbee is a popular wireless technology for smart home devices such as:
- Lights
- Motion sensors
- Door sensors
- Buttons
- Temperature sensors
- Smart plugs
A Raspberry Pi does not automatically have Zigbee support.
You typically add a compatible Zigbee coordinator or adapter.
This can allow Home Assistant to communicate with Zigbee devices directly through the coordinator.
Zigbee can be particularly useful when you want many low-power smart home sensors without putting every device directly on your Wi-Fi network.
Raspberry Pi and Thread
Thread is a low-power mesh networking technology used by modern smart home devices.
Some Matter devices use Thread rather than Wi-Fi.
To use Thread-based devices, you need suitable Thread infrastructure.
Depending on your setup, this may involve a compatible Thread border router and an appropriate controller.
When designing a new smart home, check the specific requirements of your chosen devices rather than assuming that every Raspberry Pi configuration automatically supports Thread.
Raspberry Pi and Matter
Matter is becoming increasingly important in smart home design.
Home Assistant supports Matter devices, including Matter devices that operate over compatible Wi-Fi or Thread networks.
This can make it easier to bring devices from different manufacturers into one Home Assistant environment.
However, Matter does not eliminate the need to verify device compatibility.
A Matter device can still depend on specific network infrastructure and may expose different features depending on its implementation.
Raspberry Pi Home Automation Without Internet
One of the main attractions of a Raspberry Pi running Home Assistant is the possibility of local smart home control.
Home Assistant states that it runs on your own hardware and that many functions can continue operating locally even if the internet connection is unavailable.
This can provide advantages such as:
- Lower dependence on cloud services
- Local processing
- Faster responses for supported devices
- More control over data
- Continued operation of supported local automations during some internet outages
However, not every device or integration operates locally.
A cloud-dependent device may still require internet connectivity for particular features.
Creating Your First Raspberry Pi Automation
After connecting a few devices, build one simple automation.
For example:
Trigger: Sunset
Action: Turn on the living room light.
This teaches the fundamental relationship between an event and an automated action.
After that, try:
Trigger: Motion detected
Condition: It is nighttime
Action: Turn on hallway light.
This introduces conditions.
Finally, combine several actions:
Trigger: Everyone leaves
Actions:
- Turn off selected lights
- Turn off suitable smart plugs
- Change selected devices to an away state
Starting with simple automations makes it easier to understand how the system behaves.
Beginner Raspberry Pi Automation Projects
Automatic Lighting
Use sunset or a schedule to control outdoor or indoor lights.
Motion Lighting
Use a motion sensor to activate a hallway, bathroom, or entryway light.
Door Notifications
Receive a notification when an important door opens.
Smart Plug Scheduling
Control lamps or other suitable devices on a schedule.
Temperature Monitoring
Use a temperature sensor to monitor rooms and create alerts when temperatures change.
Energy Monitoring
Track electricity consumption with compatible energy-monitoring hardware.
Welcome Home Routine
Use presence detection to activate selected devices when someone arrives.
Away Routine
Turn off unnecessary devices when everyone leaves.
These projects can all be expanded later as your system becomes more sophisticated.
Raspberry Pi Home Automation for Energy Saving
A Raspberry Pi can coordinate different devices to reduce unnecessary energy consumption.
For example:
Everyone leaves → Turn off selected lights
or:
No motion for a certain period → Turn off a suitable light
You can also connect energy-monitoring devices to track electricity consumption over time.
This information can help you identify which appliances and household systems consume the most energy.
Automation does not automatically reduce energy use, though.
The goal is to automate behaviors that would otherwise waste electricity.
Raspberry Pi Home Automation for Security
Home Assistant on a Raspberry Pi can combine security sensors and devices into one interface.
Possible devices include:
- Door sensors
- Window sensors
- Motion sensors
- Cameras
- Smart locks
- Sirens
- Exterior lights
For example:
Trigger: Door opens
Condition: Nobody is home
Action: Send a notification.
Another simple project could activate an exterior light when motion is detected at night.
Automation can supplement a broader home security strategy, but important security and safety functions should not rely entirely on one Raspberry Pi or one automation.
Raspberry Pi Home Automation for Heating
You can also use a Raspberry Pi-based system to monitor and control climate devices.
Depending on your equipment and integrations, you may be able to use:
- Smart thermostats
- Temperature sensors
- Radiator controls
- Presence detection
- Heating schedules
For example:
Everyone leaves → Reduce the thermostat setting
or:
Room temperature drops below a threshold → Take a supported heating action
Heating automations should be designed carefully because different heating systems have different operating requirements.
Choosing the Right Storage
Storage is an important consideration because Home Assistant is a system that runs continuously and writes data over time.
A quality microSD card can work for a beginner installation.
However, people running larger systems or storing significant amounts of historical data may eventually consider more durable storage options.
Raspberry Pi 5 also provides PCIe connectivity, which can be used with compatible hardware for faster storage configurations.
For a beginner, the most important step is to use reliable storage and maintain regular backups.
Backups Are Essential
A home automation server can become the central point for many parts of your smart home.
If the storage fails, you do not want to rebuild your entire setup from scratch.
Create and maintain backups of your Home Assistant configuration.
A useful backup strategy should consider:
- Home Assistant configuration
- Automation settings
- Device integrations
- Scenes
- Dashboards
- Other important configuration data
Store at least one backup separately from the Raspberry Pi itself.
Cooling the Raspberry Pi
Raspberry Pi 5 produces more heat than earlier Raspberry Pi generations.
For a continuously running home automation server, adequate cooling is important.
A suitable case and active cooling can help maintain stable operating temperatures.
Good ventilation is also important.
Do not place the Raspberry Pi inside a sealed cabinet where heat can accumulate.
Power Reliability
Home automation depends on continuous power.
If the Raspberry Pi shuts down unexpectedly, local automations and smart home services may stop working until it comes back online.
For a more reliable system, consider:
- A proper Raspberry Pi power supply
- Stable electrical power
- A small uninterruptible power supply where appropriate
- Backup networking equipment for important installations
The power requirements of your connected devices should also be considered.
Raspberry Pi vs. Home Assistant Green
A Raspberry Pi is not the only way to run Home Assistant.
Home Assistant Green is an official plug-and-play hub that comes with Home Assistant already installed. It is designed for people who want to use Home Assistant without assembling and configuring a Raspberry Pi system.
A Raspberry Pi is more attractive when:
- You already own one
- You enjoy DIY projects
- You want more hardware flexibility
- You want to learn how the system works
- You want to use the computer for additional purposes
Home Assistant Green is generally simpler when you want a dedicated appliance with minimal setup.
Raspberry Pi vs. Mini PC
A mini PC can provide more processing power and storage flexibility than a Raspberry Pi, especially for demanding installations.
A Raspberry Pi remains attractive because it is:
- Compact
- Efficient
- Widely supported
- Easy to experiment with
- Well suited to many home automation installations
For a beginner with a moderate number of smart devices, a Raspberry Pi 4 or 5 is generally enough for a Home Assistant installation.
Can a Raspberry Pi Run Other Smart Home Software?
Yes.
Home Assistant is only one option.
A Raspberry Pi can also be used for other home automation projects and software platforms, depending on your goals and technical experience.
However, beginners should avoid installing several competing automation platforms without a clear reason.
Choose one main system first.
Once you understand it, you can decide whether another service provides a useful addition.
Common Raspberry Pi Home Automation Mistakes
Using an Inadequate Power Supply
Unstable power can cause unexpected problems.
Using Poor-Quality Storage
Storage problems can affect a system that runs continuously.
Relying Only on Wi-Fi
A wired Ethernet connection can provide a more dependable connection for the automation server.
Skipping Backups
A failed storage device can otherwise mean rebuilding the system.
Buying Devices Without Checking Compatibility
Always verify the integration and communication technology before purchasing a device.
Building Too Much Too Quickly
A large installation is harder to troubleshoot.
Start with a few devices and expand gradually.
How to Make Raspberry Pi Home Automation Reliable
Use appropriate hardware.
Keep the Raspberry Pi cool.
Use a reliable power supply.
Connect it through Ethernet when practical.
Keep Home Assistant and its integrations updated.
Create regular backups.
Choose devices with good integration support.
Keep manual controls available for important household functions.
Most importantly, build the system gradually and test each new automation before depending on it.
A Good Raspberry Pi Setup for Beginners
A simple beginner system could include:
Raspberry Pi 5
Reliable power supply
32 GB or larger quality A2 microSD card
Ethernet connection
Home Assistant OS
One smart light
One motion sensor
One smart plug
This is enough to learn the fundamental concepts without spending heavily on hardware.
From there, you can add sensors, thermostats, security devices, Zigbee or Matter products, and more advanced automations.
Is Raspberry Pi Home Automation Worth It?
Raspberry Pi home automation is worth considering if you want a flexible DIY smart home system and are comfortable with a little setup work.
It is particularly attractive for people who already own a Raspberry Pi or want to learn more about smart home technology.
The platform can grow from a simple lighting project into a much larger system with sensors, climate control, security, energy monitoring, and multi-device automation.
However, a Raspberry Pi is not automatically the best choice for everyone.
Someone who wants the simplest possible setup may prefer a dedicated hub such as Home Assistant Green.
The best option depends on how much control and customization you want.
Final Thoughts
Raspberry Pi home automation provides a practical way to build a flexible smart home system around hardware that you control.
For beginners, Raspberry Pi 4 or Raspberry Pi 5 combined with Home Assistant OS provides a straightforward starting point. Home Assistant handles the integrations and automation logic while the Raspberry Pi provides the computer running the system.
Start with a few devices and simple projects such as automatic lighting, motion detection, smart plugs, and notifications.
Once the basics are reliable, you can expand into Zigbee, Thread, Matter, security, climate control, and energy monitoring.
The biggest advantage of this approach is flexibility. You can build a smart home at your own pace while learning how the technology works instead of committing to a large and complicated system from the beginning.