
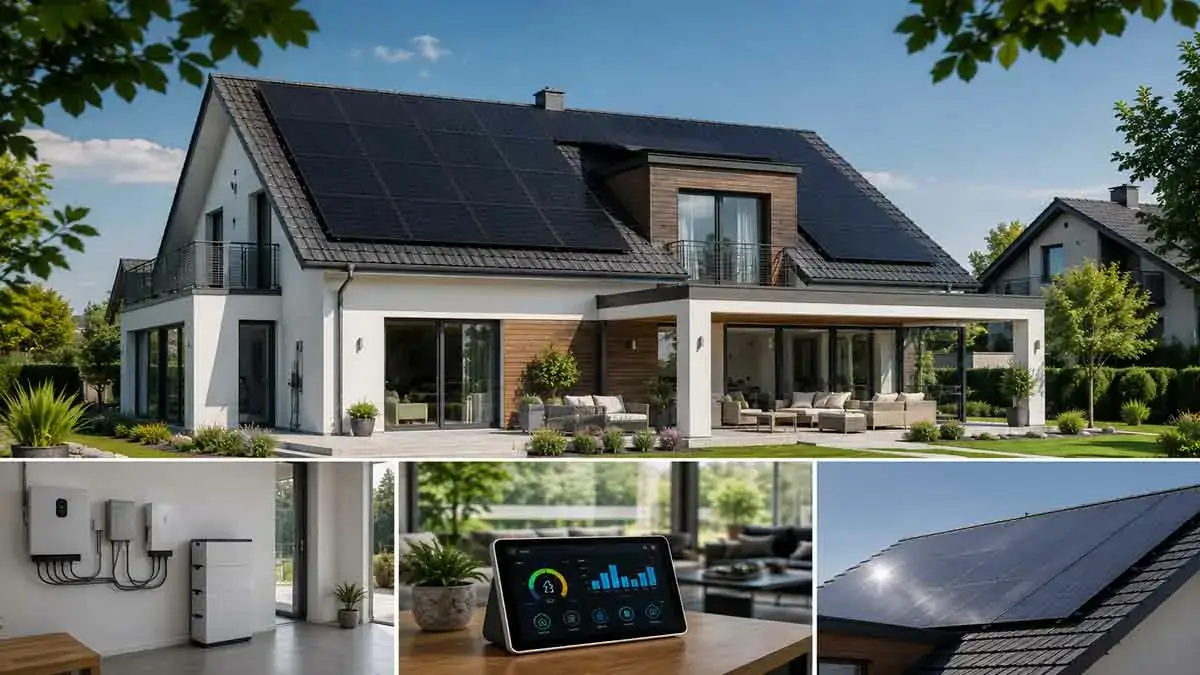
Solar panels for homes allow homeowners to generate electricity from sunlight using photovoltaic (PV) technology. A residential solar panel system can reduce reliance on grid electricity and, when properly designed, provide a significant portion of a home’s annual electricity needs.
However, choosing solar panels is not simply a matter of selecting the highest wattage or efficiency rating. The right panels depend on available roof space, sunlight exposure, shading, climate, panel efficiency, physical dimensions, degradation rate, warranties, system design, and total installed cost.
A panel that looks better on paper may not provide the best overall value for a particular home.
This guide explains how residential solar panels work, the main types available, how to compare panel specifications, how roof conditions affect performance, and what homeowners should evaluate before choosing solar panels.
Table of Contents
What Are Solar Panels for Homes?
Solar panels are devices that convert sunlight into electricity through photovoltaic cells.
Residential solar panels are usually installed on rooftops, although ground-mounted systems may also be used when sufficient property space is available.
A typical solar panel contains multiple photovoltaic cells connected together to produce electricity.
The panels generate direct current (DC) electricity. An inverter or microinverter system then converts that electricity into alternating current (AC) for use by household electrical equipment.
A residential solar installation may include:
- Solar panels
- Mounting equipment
- Inverters or microinverters
- Electrical wiring
- Monitoring equipment
- Safety equipment
- Utility connection equipment
- Optional battery storage
The panels themselves are only one part of the complete solar energy system.
How Do Residential Solar Panels Work?
The basic process is:
Sunlight → Photovoltaic Cells → DC Electricity → Inverter → AC Electricity → Home
When sunlight reaches the photovoltaic cells, electrical energy is generated.
The amount of electricity produced depends on several factors, including:
- Solar irradiance
- Panel efficiency
- Panel size
- Roof orientation
- Roof angle
- Shading
- Temperature
- Soiling
- System losses
Solar panels do not produce the same amount of electricity every hour. Production changes throughout the day and across different seasons.
Types of Solar Panels for Homes
Several photovoltaic technologies are available, although some are much more common in residential applications than others.
The most important categories are:
- Monocrystalline
- Polycrystalline
- Thin-film
The best choice depends on the available space, desired output, budget, and products available in the local market.
Monocrystalline Solar Panels
Monocrystalline panels are widely used in modern residential solar installations.
They are manufactured using crystalline silicon and are generally known for relatively high efficiency and good power output per unit of roof area.
Potential advantages include:
- High efficiency
- Good space utilization
- Strong long-term performance
- Wide residential availability
- Consistent appearance
They can be particularly useful when roof space is limited.
Polycrystalline Solar Panels
Polycrystalline panels are another crystalline-silicon technology.
They were widely used in residential installations, although many current markets have shifted toward higher-efficiency monocrystalline products.
Potential characteristics include:
- Lower efficiency than many newer monocrystalline panels
- Different appearance
- Potentially lower cost in some markets
- Greater roof-space requirements for equivalent system capacity
Availability varies by manufacturer and region.
Thin-Film Solar Panels
Thin-film solar panels use photovoltaic materials deposited in thin layers rather than traditional crystalline silicon cells.
Potential characteristics include:
- Lightweight designs
- Flexible applications for certain products
- Different temperature and performance characteristics
- Lower power density in many applications
Because residential rooftops often have limited space, thin-film technology is generally less common for standard home installations.
How Much Power Does a Solar Panel Produce?
A solar panel’s rated power is normally expressed in watts.
For example, a panel may have a rated output of:
- 350 watts
- 400 watts
- 450 watts
- 500 watts
This rating represents the panel’s electrical power under specified test conditions.
It does not mean that the panel will produce that amount of electricity continuously throughout the day.
Actual energy production is measured over time in kilowatt-hours (kWh).
How Many Solar Panels Does a Home Need?
The required number of panels depends on the home’s electricity consumption and the expected production of each panel.
A basic capacity calculation is:
System Capacity ÷ Panel Wattage = Approximate Number of Panels
For example:
6,000 watts ÷ 400 watts = 15 panels
However, this calculation only determines the approximate number of panels needed to reach a particular system capacity.
Actual system sizing should also consider:
- Annual electricity consumption
- Local solar conditions
- Roof orientation
- Shading
- Available roof area
- Expected annual production
- Future electricity demand
Solar Panel Efficiency Explained
Solar panel efficiency indicates how effectively a panel converts available sunlight into electrical power under specified conditions.
Higher-efficiency panels can produce more power from a given amount of roof space.
This becomes particularly important when:
- Roof space is limited
- Electricity demand is high
- The homeowner wants to maximize output from a small roof area
However, higher efficiency usually comes with a higher equipment price.
The best value is not necessarily the panel with the highest efficiency.
Solar Panel Wattage Explained
Wattage describes the rated power output of an individual panel.
A higher-wattage panel can reduce the number of panels required to reach a specific system capacity.
For example, reaching a 6 kW system capacity could require approximately:
15 × 400-watt panels
or:
12 × 500-watt panels
But the physical dimensions of the panels also matter.
A 500-watt panel may be physically larger, so homeowners should compare power density, not wattage alone.
Solar Panel Size and Dimensions
Physical panel dimensions affect how many panels can fit on a roof.
Before choosing panels, consider:
- Panel length
- Panel width
- Panel thickness
- Roof layout
- Roof edges
- Roof penetrations
- Required access pathways
- Local installation requirements
Two panels with similar wattage can have different physical dimensions.
For limited roof space, the amount of power generated per unit of roof area can be more important than the panel’s wattage alone.
Solar Panel Output vs System Capacity
It is important to distinguish between:
Panel capacity
and:
Energy production
For example, a home may have:
6 kW of installed solar capacity
but produce a different amount of electricity each day depending on sunlight and system conditions.
A system’s annual production is measured in kWh.
Therefore:
kW = Power capacity
kWh = Energy produced or consumed over time
Understanding this difference helps homeowners interpret solar proposals correctly.
Step 1: Review Your Home’s Electricity Use
Start by reviewing at least 12 months of electricity bills.
Record:
- Monthly kWh
- Annual kWh
- Average daily consumption
- Seasonal peaks
- Major electrical loads
This information provides a starting point for determining the required solar capacity.
Do not size a system based solely on one unusually high or low electricity bill.
Step 2: Evaluate Available Roof Space
Determine how much roof area is actually suitable for solar panels.
Usable space may be reduced by:
- Chimneys
- Skylights
- Roof vents
- Dormers
- Roof edges
- HVAC equipment
- Existing structures
- Required access areas
The total roof area is therefore not the same as the usable solar area.
Step 3: Check Roof Orientation
Roof direction affects solar exposure.
The best orientation depends on:
- Geographic location
- Sun path
- Roof design
- Household electricity-use patterns
A roof does not automatically become unsuitable for solar because it does not face the theoretically optimal direction.
The important question is how much annual electricity the proposed panel arrangement is expected to generate.
Step 4: Evaluate Roof Angle
Roof pitch can influence solar production.
However, many residential roofs can support effective solar generation even when their angle is not ideal.
Installers can model production based on the actual roof pitch rather than relying on a generic assumption.
Step 5: Check for Shading
Shading can reduce solar production.
Potential sources include:
- Trees
- Chimneys
- Neighboring buildings
- Roof structures
- Utility structures
- Future construction
Shading should be evaluated at different times of day and, where possible, during different seasons.
A panel that receives full sunlight in the morning may experience significant afternoon shading.
Step 6: Consider Local Climate
Climate affects solar panel performance and annual production.
Consider:
- Average sunlight
- Cloud cover
- Temperature
- Dust
- Rainfall
- Snow where applicable
- Seasonal changes
Solar panels can continue producing electricity in cloudy conditions, but output is generally lower than during strong sunlight.
Step 7: Compare Panel Efficiency
When comparing panels, check their efficiency ratings under standardized test conditions.
Higher efficiency can be valuable when roof space is limited.
However, compare efficiency alongside:
- Panel price
- Rated wattage
- Physical dimensions
- Warranty
- Degradation rate
- Expected system production
The goal is to maximize useful electricity production at a reasonable overall cost.
Step 8: Compare Panel Wattage
Compare the rated power of each panel.
For example:
| Panel Rating | Panels for Approx. 6 kW |
|---|---|
| 350 W | 18 |
| 400 W | 15 |
| 450 W | 14 |
| 500 W | 12 |
These numbers are approximate because actual system capacity may not equal the simple rounded result.
Higher wattage can reduce panel count, but it should always be evaluated against physical size and price.
Step 9: Consider Temperature Performance
Solar panel output can be affected by temperature.
Panel specifications commonly include a temperature coefficient that indicates how power output changes as cell temperature increases.
Compare this specification when evaluating panels for hot climates.
A panel’s nominal efficiency under standardized test conditions does not tell the entire story about real-world performance.
Step 10: Understand Solar Panel Degradation
Solar panels gradually lose some generating capacity over time.
This is known as degradation.
Manufacturers typically specify expected performance over a long period through a performance warranty.
When comparing panels, look at:
- Initial rated power
- Annual degradation rate
- Guaranteed output after several years
- Warranty duration
A small difference in degradation may become more relevant over a system’s long operating life.
Step 11: Review Solar Panel Warranties
Solar panels generally come with warranties covering different aspects of the product.
Review:
- Product warranty
- Performance warranty
- Warranty duration
- Coverage limitations
- Claim procedures
- Transferability where applicable
Do not assume that a long warranty automatically means comprehensive coverage.
Read the actual warranty terms.
Step 12: Compare Product and Performance Warranties
These warranties serve different purposes.
Product Warranty
The product warranty generally addresses defects or failures in the physical panel under specified conditions.
Performance Warranty
The performance warranty addresses the panel’s expected electrical output over time.
A panel can have a long product warranty but still have different performance guarantees.
Review both before making a purchase decision.
Step 13: Consider Panel Appearance
Solar panels can remain visible on a roof for many years.
Homeowners may therefore consider:
- Panel color
- Frame color
- Cell appearance
- Overall layout
Appearance does not directly determine energy production, but it can matter for homeowners concerned about how the finished installation looks.
Step 14: Check Panel Compatibility
Solar panels must be compatible with the rest of the solar system.
Consider compatibility with:
- Inverters
- Microinverters
- Power optimizers
- Mounting systems
- Electrical equipment
- System voltage and current requirements
The installer should verify system compatibility before installation.
Step 15: Compare Manufacturer Reputation
Consider the manufacturer’s:
- Product history
- Warranty support
- Availability
- Technical documentation
- Long-term presence in the market
A solar panel is a long-term component, so support can matter as much as the initial specifications.
Step 16: Consider Roof Structure
Solar panels and mounting equipment add weight and mechanical loads to the roof.
The roof structure should be evaluated according to applicable building requirements and installation practices.
The installer may need to assess:
- Roof framing
- Mounting points
- Wind exposure
- Snow loads where applicable
- Structural condition
Do not assume that every roof is automatically ready for solar installation.
Step 17: Check Roof Condition
Solar panels can remain installed for decades.
If the roof is already approaching the end of its useful life, consider addressing the roofing work before installing solar panels.
Otherwise, future roof repairs may require panel removal and reinstallation.
Check for:
- Existing leaks
- Damaged roofing
- Aging materials
- Structural concerns
- Previous repairs
Step 18: Consider Future Electricity Needs
Current electricity consumption may not represent future demand.
Electricity use can increase after adding:
- Electric vehicle charging
- Heat pumps
- Electric water heating
- Additional appliances
- Home additions
Discuss expected future loads with the solar designer before finalizing the system.
Step 19: Compare Panels by Cost per Watt
Cost per watt can be useful when comparing similar panels.
A simplified calculation is:
Panel Price ÷ Panel Rated Wattage = Cost per Watt
For example:
$200 ÷ 400 W = $0.50 per watt
However, panel price alone does not represent total solar system cost.
Installation, mounting, inverter equipment, electrical work, permitting, and other components also contribute to the final project cost.
Step 20: Compare Total Installed Cost
When comparing solar proposals, evaluate the complete system rather than individual panel prices.
Consider:
- Panels
- Inverters
- Mounting
- Electrical equipment
- Installation labor
- Permitting
- Monitoring
- Optional battery storage
- Warranty coverage
A slightly more expensive panel may provide better overall value if it offers higher production, better space utilization, or stronger long-term coverage.
Step 21: Understand Solar Panel Ratings
Solar panel specifications may include:
- Rated power
- Efficiency
- Open-circuit voltage
- Short-circuit current
- Operating voltage
- Operating current
- Temperature coefficient
- Maximum system voltage
Homeowners do not need to analyze every electrical specification themselves.
However, understanding the basic ratings can make it easier to compare professional proposals.
Step 22: Understand Standard Test Conditions
Solar panels are commonly tested under standardized laboratory conditions.
These conditions allow different products to be compared using consistent measurements.
However, actual outdoor conditions are different.
Real-world performance can be affected by:
- Temperature
- Sunlight intensity
- Panel orientation
- Shading
- Dust
- Wiring losses
- Inverter losses
Therefore, laboratory ratings should not be treated as guaranteed daily production.
Step 23: Understand Real-World Solar Production
Actual energy production varies throughout the year.
Production can change because of:
- Cloud cover
- Seasonal sunlight
- Temperature
- Shading
- Dust
- Roof orientation
- Panel angle
A professional solar proposal should provide a realistic estimate of expected annual production rather than simply multiplying panel wattage by daylight hours.
Step 24: Consider Partial Shading
Partial shading deserves special attention.
If only part of a solar array is shaded, the impact depends on:
- Panel arrangement
- Electrical configuration
- Inverter design
- Power optimizers
- Microinverters
If shading varies significantly across the roof, ask the installer to explain how the proposed system manages those differences.
Step 25: Consider Dust and Soiling
Dust and other surface buildup can reduce solar production.
Potential sources include:
- Dust
- Pollen
- Leaves
- Bird droppings
- Air pollution
The impact depends on local conditions and rainfall.
Homes in dusty environments may need more attention to panel cleanliness than homes that receive regular rainfall.
Step 26: Understand Panel Maintenance
Solar panels generally require limited routine maintenance.
Homeowners should still monitor:
- Electricity production
- System alerts
- Visible debris
- Shading changes
- Physical damage
Do not attempt electrical repairs yourself unless properly qualified.
Step 27: Do Solar Panels Need Cleaning?
Cleaning requirements vary by location.
Rain may naturally remove some dust, while dry or dusty environments may experience greater buildup.
Cleaning may be more useful when:
- Panels are visibly dirty
- Production has declined unexpectedly
- The property is exposed to significant dust
- Bird activity causes buildup
Follow manufacturer guidance and use safe cleaning methods.
Step 28: Monitor Solar Panel Performance
Monitoring allows homeowners to compare actual production with expected performance.
Depending on the system, monitoring may provide:
- Daily production
- Monthly production
- Historical production
- System alerts
- Panel-level information in some systems
A significant unexplained decline should be investigated rather than ignored.
Step 29: Recognize Common Solar Panel Problems
Potential issues include:
- Reduced production
- Physical damage
- Hot spots
- Cracked panels
- Electrical connection problems
- Inverter faults
- Monitoring failures
- New shading
Not every production decline means a panel has failed.
Seasonal changes and weather should be considered first.
Step 30: Understand Panel Damage
Solar panels are designed for outdoor conditions, but they can still be damaged by:
- Severe weather
- Falling branches
- Hail
- Improper installation
- Thermal stress
- Other physical impacts
Visible cracks or other physical damage should be evaluated by a qualified professional.
Step 31: Understand Solar Panel Lifespan
Solar panels are designed for long-term operation.
Their useful life depends on:
- Product quality
- Installation quality
- Environmental conditions
- Maintenance
- Exposure to weather
Panels generally do not suddenly stop working at the end of a specific number of years.
Instead, their electrical output gradually declines.
Step 32: Compare New and Older Panel Technology
Solar technology continues to develop.
Newer panels may offer improvements in:
- Efficiency
- Power density
- Temperature performance
- Physical design
- Warranty terms
However, newer technology is not automatically better for every installation.
Compare the actual specifications and total system value.
Step 33: Consider High-Efficiency Solar Panels
High-efficiency panels can be especially useful for homes with limited roof space.
Their advantages may include:
- More power from a smaller area
- Higher system capacity on constrained roofs
- Fewer panels for a target capacity in some cases
However, higher efficiency can increase the cost per panel.
Evaluate whether the additional output justifies the additional cost.
Step 34: Consider Limited Roof Space
When roof space is limited, prioritize:
- High efficiency
- High power density
- Suitable physical dimensions
- Appropriate roof placement
- Effective shading management
A high-wattage panel that is too large for the available roof sections may not be the best practical choice.
Step 35: Consider Large Roofs
Homes with large usable roof areas may have more flexibility.
In these situations, the highest possible efficiency may not be necessary if lower-cost panels can provide the required system capacity using available space.
This is why panel selection should always consider the entire roof rather than a single specification.
Step 36: Compare Solar Panel Quotes
Request multiple detailed solar proposals when possible.
Compare:
- Panel manufacturer
- Panel model
- Rated wattage
- Efficiency
- Number of panels
- Expected annual production
- Inverter configuration
- Warranty terms
- Total installed cost
Make sure the proposals use realistic and comparable production assumptions.
Step 37: Questions to Ask a Solar Installer
Before signing a contract, ask:
- Which panel model is being proposed?
- What is its rated wattage?
- What is its efficiency?
- What is the expected annual production?
- What is the degradation rate?
- What warranties apply?
- How will shading affect production?
- Why is this panel appropriate for my roof?
- What happens if a panel fails?
- Who handles warranty claims?
Clear answers can help you distinguish between a well-designed proposal and a sales-focused presentation.
Step 38: Check the Installation Proposal
Review the proposal carefully before signing.
Confirm:
- Panel model
- Panel quantity
- System capacity
- Inverter model
- Mounting approach
- Expected annual production
- Warranty coverage
- Installation scope
- Total cost
- Payment terms
The equipment listed in the contract should match what the installer presented during the sales process.
Step 39: Avoid Choosing Panels by Wattage Alone
High wattage is useful, but it is only one specification.
A better comparison includes:
Wattage + Efficiency + Size + Degradation + Warranty + Cost
This provides a more realistic picture of long-term value.
Step 40: Balance Performance, Cost, and Warranty
The best solar panel for a home is usually the one that provides an appropriate balance between:
- Energy production
- Roof-space utilization
- Equipment cost
- Long-term performance
- Warranty coverage
- Installer support
Do not pay substantially more for a specification that provides little practical benefit for your particular roof.
Solar Panels for Homes Checklist
Energy Use
- Review 12 months of electricity bills
- Calculate annual electricity consumption
- Identify future electrical loads
- Understand seasonal consumption
Roof
- Check roof condition
- Measure usable roof area
- Evaluate orientation
- Evaluate roof angle
- Check shading
- Consider structural requirements
Panel Selection
- Compare panel technology
- Compare efficiency
- Compare wattage
- Compare physical dimensions
- Check temperature coefficient
- Review degradation
- Review warranties
- Check manufacturer support
System Design
- Check inverter compatibility
- Evaluate shading management
- Review expected annual production
- Review monitoring
- Confirm system capacity
Financial Comparison
- Compare panel cost
- Compare cost per watt
- Compare total installed cost
- Compare warranty coverage
- Compare multiple proposals
Common Solar Panel Selection Mistakes
Choosing the Highest Wattage
Higher wattage does not automatically mean better value.
Physical size, efficiency, price, and roof layout also matter.
Choosing Only by Efficiency
A high-efficiency panel may cost more without providing enough additional benefit to justify the difference.
Ignoring Roof Space
Panel dimensions can determine whether the desired system will actually fit.
Ignoring Shading
Even excellent panels can produce less electricity when significant shading is present.
Ignoring Degradation
Long-term performance matters because solar panels are intended to operate for many years.
Focusing Only on the Panel Price
The total solar installation includes much more than the panels themselves.
Ignoring Warranty Terms
Warranty duration and actual coverage are not always the same thing.
Comparing Different Proposals Incorrectly
A proposal with more panels is not automatically better.
Compare expected annual production, equipment, warranties, and total installed cost.
Installing Panels on an Aging Roof
A roof that needs replacement soon can create additional costs after solar installation.
Assuming Newer Technology Is Always Better
New technology can offer advantages, but the best choice depends on the specific property and project economics.
Are Solar Panels Worth It for Your Home?
Solar panels can be worthwhile when the home has suitable solar exposure, sufficient usable roof space, and electricity consumption that makes solar generation valuable.
Important factors include:
- Annual electricity use
- Roof condition
- Sunlight exposure
- Shading
- Available roof area
- Panel efficiency
- System cost
- Expected production
- Electricity rates
- Local utility policies
- Expected ownership period
There is no single solar panel that is best for every home.
The right choice depends on how the equipment performs under the actual conditions of the property.
How to Choose Solar Panels for Your Home
Use this process:
Step 1: Review Your Electricity Consumption
Understand how much electricity your home uses throughout the year.
Step 2: Evaluate the Roof
Check condition, orientation, angle, shading, and usable area.
Step 3: Determine the Required System Capacity
Estimate how much solar capacity is appropriate for your electricity needs and property.
Step 4: Compare Panel Specifications
Evaluate:
- Efficiency
- Wattage
- Dimensions
- Temperature performance
- Degradation
- Warranty
Step 5: Check System Compatibility
Make sure the selected panels work with the proposed inverter and other equipment.
Step 6: Compare Total Costs
Evaluate the complete installed system rather than the panel price alone.
Step 7: Compare Multiple Proposals
Request detailed proposals from qualified installers and compare them using the same criteria.
Step 8: Review the Contract
Confirm that the final equipment, production estimate, warranties, and installation scope match the proposal.
Step 9: Monitor Performance
After installation, track solar production and investigate significant unexplained changes.
Final Thoughts
Solar panels for homes can provide a practical way to generate electricity from sunlight, but choosing the right panels requires more than comparing wattage numbers.
Start with your home’s electricity consumption and available roof space. Then evaluate sunlight exposure, shading, panel efficiency, wattage, physical dimensions, temperature performance, degradation, warranties, and total installed cost.
For homes with limited roof space, high-efficiency panels may provide an advantage. For homes with larger usable roofs, lower-cost panels may offer better overall value even if their efficiency is not the highest available.
The best solar panel is not necessarily the most powerful or most efficient model. It is the panel that fits the roof, works effectively with the system design, provides appropriate long-term performance, and offers a reasonable balance of cost and value.
Measure your energy needs, evaluate your roof, compare complete proposals, and choose solar panels based on the entire system rather than a single specification.