
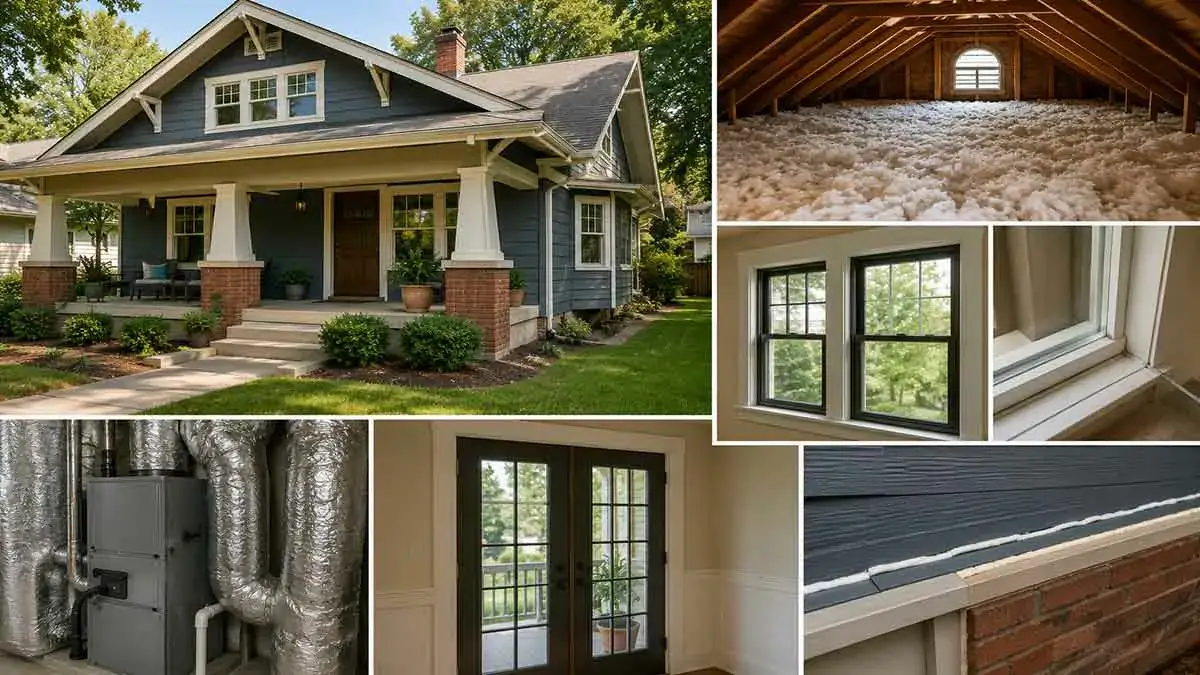
Older homes can offer character, durable construction, and architectural details that are difficult to reproduce in modern houses. However, many older properties were built before current energy-efficiency practices became common.
As a result, an older home may have inadequate insulation, air leakage, inefficient windows, aging HVAC equipment, uninsulated foundations, or outdated appliances. These issues can increase energy use and make some rooms difficult to keep comfortable.
Improving an older home does not necessarily require a complete renovation or replacing every original component. In many cases, the best results come from identifying the home’s biggest energy losses and addressing them in the right order.
The goal is to improve the building’s thermal performance while preserving important architectural features and avoiding new problems involving moisture, ventilation, or building durability.
This guide explains how to make an older home more energy efficient, which improvements to prioritize, what to inspect before starting, and which upgrades may not be worth doing immediately.
Table of Contents
Why Older Homes Often Use More Energy
An older home is not automatically inefficient, but it is more likely to contain construction features that can increase energy use.
Common issues include:
- Limited attic insulation
- Missing or deteriorated wall insulation
- Air leaks around windows and doors
- Unsealed plumbing and electrical penetrations
- Uninsulated basements or crawl spaces
- Leaky ductwork
- Aging heating and cooling equipment
- Inefficient water heaters
- Older appliances
- Poor exterior shading
- Moisture and drainage problems
The condition of the building matters more than its age alone.
A well-maintained older home can perform better than a poorly constructed newer home. The most useful approach is therefore to inspect the actual building rather than assuming that every older property needs the same upgrades.
Start With an Energy Assessment
Before spending money on major upgrades, determine where the home is losing or using energy.
Start by evaluating:
- Attic insulation
- Air leakage
- Exterior walls
- Basement or crawl space
- Windows and doors
- HVAC equipment
- Ductwork
- Water heating
- Moisture conditions
- Ventilation
Review recent utility bills to identify unusual or increasing energy consumption.
For more detailed information, consider a professional home energy audit. Depending on the service, testing may include blower-door testing, infrared imaging, insulation inspection, duct evaluation, and other diagnostic methods.
An assessment helps prevent a common mistake: spending heavily on an upgrade that does not address the home’s largest problem.
1. Seal Major Air Leaks
Air leakage is common in older homes and can contribute to drafts, uneven temperatures, and higher heating and cooling demand.
Potential leakage locations include:
- Attic penetrations
- Plumbing openings
- Electrical penetrations
- Window frames
- Door frames
- Baseboards
- Rim joists
- Utility penetrations
- Duct penetrations
Air sealing should focus on significant uncontrolled airflow rather than sealing every opening indiscriminately.
Do not block required ventilation openings or interfere with combustion-air requirements.
2. Improve Attic Insulation
The attic is often one of the most important areas to inspect in an older home.
Look for:
- Thin insulation
- Missing sections
- Compressed insulation
- Uneven coverage
- Damaged insulation
- Moisture
- Pest activity
Before adding insulation, identify major air leaks between the living space and attic.
Also inspect the roof for leaks and verify that attic ventilation remains functional.
Adding more insulation over an unresolved moisture or air-leakage problem can hide the underlying issue rather than solve it.
3. Air Seal Before Adding Insulation
Insulation and air sealing perform different functions.
Insulation slows heat transfer through the building assembly, while air sealing reduces uncontrolled movement of air through gaps and penetrations.
If major air leaks remain, air can bypass insulation and reduce the effectiveness of the overall assembly.
Pay particular attention to:
- Plumbing penetrations
- Electrical penetrations
- Attic hatches
- Framing joints
- Duct openings
- Other openings between conditioned and unconditioned spaces
Maintain appropriate clearances around chimneys, flues, recessed fixtures, and heat-producing equipment.
4. Inspect Wall Construction
Older homes can contain wall assemblies that differ significantly from modern construction.
Walls may contain:
- Empty cavities
- Older insulation materials
- Plaster
- Masonry
- Brick
- Multiple layers of previous alterations
- Moisture-sensitive materials
Before adding insulation, determine how the wall is constructed.
A wall that appears underinsulated may also have moisture or drainage problems. Adding insulation without understanding how the assembly handles moisture can create durability problems.
5. Upgrade Wall Insulation Carefully
Wall insulation can improve energy performance when significant deficiencies are confirmed, but retrofitting finished walls can be complicated.
Possible approaches include:
- Insulating exposed cavities during remodeling
- Adding insulation through appropriate retrofit methods
- Improving insulation during exterior wall work
- Correcting specific areas with obvious deficiencies
The correct method depends on the wall assembly, climate, moisture conditions, exterior materials, and existing insulation.
Older or historic homes may require additional care because changes to the wall assembly can affect how moisture enters, moves through, and exits the structure.
6. Insulate the Basement or Crawl Space
An uninsulated basement or crawl space can contribute to cold floors, drafts, and heat loss.
Inspect these areas for:
- Water intrusion
- Condensation
- Dampness
- Mold
- Damaged insulation
- Air leakage
- Poor drainage
The appropriate insulation location depends on the design.
In some homes, insulating foundation walls may be more appropriate. In others, insulating the floor above an unconditioned crawl space may make more sense.
Correct moisture problems before installing insulation.
7. Seal and Insulate Rim Joists
Rim joists can be a significant source of air leakage in older homes.
Inspect the area where the floor framing meets the exterior wall.
Look for:
- Gaps
- Missing insulation
- Drafts
- Moisture
- Deteriorated materials
Appropriate air sealing and insulation can improve comfort and reduce uncontrolled heat transfer between the home and outdoors.
8. Repair and Weatherproof Older Windows
Older windows are often blamed for high energy use, but replacement is not always the best first step.
Inspect:
- Weatherstripping
- Window frames
- Caulking
- Glazing
- Hardware
- Gaps around frames
- Signs of water intrusion
Simple repairs and weatherproofing can reduce drafts while preserving original windows.
Consider replacement when windows are severely damaged, difficult to repair, or significantly underperform compared with suitable alternatives.
Window improvements should be evaluated alongside insulation and air sealing rather than treated as an automatic first priority.
9. Improve Exterior Doors
Older exterior doors can allow substantial air leakage when weatherstripping and thresholds have deteriorated.
Check:
- Door seals
- Weatherstripping
- Door sweeps
- Thresholds
- Frame alignment
- Hardware
A properly adjusted door with effective weatherstripping can improve comfort without requiring complete replacement.
10. Check the Roof and Attic for Moisture
Moisture problems should be corrected before major insulation work.
Inspect for:
- Roof leaks
- Wet insulation
- Condensation
- Mold
- Damaged roof sheathing
- Water stains
Also check whether bathroom or kitchen exhaust is incorrectly discharging into the attic.
Adding insulation over wet or damaged materials can make future inspection and repairs more difficult.
11. Improve Heating and Cooling Systems
Older HVAC equipment may consume more energy than modern systems, but replacement should be carefully timed.
Before installing new equipment, consider whether major air leaks and insulation deficiencies are increasing the home’s heating or cooling load.
A useful sequence is:
- Address major air leakage.
- Correct inadequate insulation.
- Resolve moisture problems.
- Evaluate the home’s heating and cooling requirements.
- Replace HVAC equipment when appropriate.
Improving the building envelope first can help prevent selecting equipment that is larger than necessary.
12. Maintain Existing HVAC Equipment
An older HVAC system may continue to operate effectively when properly maintained.
Depending on the equipment, maintenance may include:
- Replacing or cleaning filters
- Cleaning accessible components
- Maintaining airflow
- Keeping outdoor units clear
- Inspecting duct connections
- Scheduling professional service
Also consider equipment safety and combustion performance where applicable.
Maintenance is often a lower-cost first step than immediate replacement.
13. Inspect and Seal Ductwork
Ductwork can lose conditioned air when it passes through unconditioned areas such as:
- Attics
- Crawl spaces
- Garages
- Unfinished basements
Inspect accessible ducts for:
- Loose connections
- Damaged sections
- Air leaks
- Missing insulation
- Crushed ducts
Proper sealing and insulation can improve the performance of an existing HVAC system.
14. Improve Thermostat Controls
Older homes may use outdated thermostats or controls that provide limited scheduling and temperature management.
A programmable or smart thermostat may improve control when it is compatible with the existing heating and cooling system.
Before installing one, verify system compatibility.
A thermostat upgrade alone will not correct poor insulation, air leakage, or HVAC distribution problems.
15. Improve Water Heating Efficiency
Water heating can represent a substantial portion of household energy use.
Review:
- Water heater age
- Equipment condition
- Temperature settings
- Hot-water demand
- Tank insulation
- Pipe insulation
Repair leaking faucets and hot-water pipes promptly.
When replacement becomes necessary, compare available technologies based on household demand, installation requirements, energy source, and expected operating costs.
16. Insulate Accessible Hot-Water Pipes
Accessible hot-water pipes can lose heat as water travels from the water heater to fixtures.
Appropriate pipe insulation may:
- Reduce some heat loss
- Help hot water remain warm longer
- Improve delivery time in some situations
Follow applicable installation requirements and maintain proper clearances around heating equipment.
17. Upgrade Inefficient Lighting
Older homes may contain incandescent or other inefficient lighting.
Replacing suitable bulbs with LEDs can reduce electricity use while maintaining similar lighting levels.
Also consider:
- Occupancy sensors
- Timers
- Task lighting
- Daylight use
Check compatibility with existing fixtures, dimmers, and controls before installing replacement bulbs.
18. Replace Aging Appliances Strategically
Older appliances may consume more energy than suitable modern alternatives.
However, replacing every appliance immediately is not necessarily cost-effective.
Evaluate:
- Current energy consumption
- Appliance condition
- Repair history
- Expected remaining lifespan
- Replacement cost
- Expected operating savings
Refrigerators, clothes dryers, washing machines, dishwashers, and dehumidifiers may be worth reviewing because of their operating frequency.
19. Reduce Standby Electricity Use
Older homes often accumulate multiple electronic devices over time.
Some equipment consumes small amounts of electricity while in standby mode.
Examples include:
- Televisions
- Streaming devices
- Computers
- Printers
- Audio equipment
- Chargers
Use built-in power-management settings or appropriate power strips where practical.
Standby power is usually a secondary priority compared with major heating, cooling, insulation, and air-leakage problems.
20. Control Solar Heat Gain
Older homes with large windows may experience substantial solar heat gain during hot weather.
Possible strategies include:
- Exterior awnings
- Shutters
- Blinds
- Curtains
- Appropriate exterior shading
- Landscaping that provides suitable shade
Exterior shading can be particularly effective because it reduces solar radiation before it reaches the glass.
The appropriate solution depends on climate, window orientation, and the home’s architectural design.
21. Seal Exterior Penetrations Carefully
Inspect exterior penetrations around:
- Pipes
- Cables
- Vents
- Windows
- Doors
- Utility connections
Deteriorated sealants can allow air and water infiltration.
Use compatible materials and avoid sealing areas that are intentionally designed to drain or ventilate.
For older masonry and historic materials, choose repair methods carefully to avoid trapping moisture or damaging the original construction.
22. Correct Drainage and Foundation Problems
Energy upgrades should not be used to cover water problems.
Inspect:
- Gutters
- Downspouts
- Exterior grading
- Foundation drainage
- Basement walls
- Plumbing
Direct roof and surface water away from the foundation where appropriate.
Correcting moisture problems first protects the building and creates better conditions for later insulation work.
23. Control Indoor Humidity
Older homes can experience moisture problems because of air leakage, inadequate ventilation, plumbing issues, or foundation moisture.
Watch for:
- Condensation
- Musty odors
- Mold
- Damp surfaces
- Persistent high humidity
Identify and correct the source rather than relying only on a dehumidifier.
Energy improvements should work together with an appropriate moisture-control strategy.
24. Improve Bathroom and Kitchen Ventilation
Bathrooms and kitchens produce significant amounts of moisture.
Check that exhaust fans:
- Operate properly
- Move air effectively
- Have intact ducts
- Exhaust outdoors where appropriate
Never use the attic or crawl space as an unintended destination for moist exhaust air.
Improving ventilation can protect both the occupants and the building materials.
25. Maintain Required Ventilation
Air sealing can improve energy efficiency, but the objective is not to eliminate all airflow.
Homes need appropriate ventilation to manage:
- Indoor pollutants
- Moisture
- Odors
- Combustion byproducts
Combustion appliances require particular attention because changes in building air tightness can affect combustion and venting conditions.
Major air-sealing projects should therefore consider ventilation and combustion safety together.
26. Improve Energy Efficiency During Renovations
Renovations create valuable opportunities to improve hidden parts of an older home.
When walls, ceilings, floors, or exterior finishes are already being opened, consider:
- Adding appropriate insulation
- Sealing air leaks
- Improving flashing
- Correcting moisture problems
- Sealing penetrations
- Improving ductwork
Work completed while surfaces are already open can be more practical than attempting the same upgrade after the renovation is finished.
27. Prioritize Improvements by Impact
Older homes can have many possible energy upgrades, but not all deserve equal priority.
A practical sequence is:
First: Correct Water and Moisture Problems
Repair roof leaks, foundation moisture, plumbing leaks, and drainage problems.
Second: Seal Major Air Leaks
Reduce significant uncontrolled airflow between conditioned and unconditioned spaces.
Third: Improve Inadequate Insulation
Focus on areas where inspection confirms meaningful deficiencies.
Fourth: Improve HVAC Performance
Maintain, repair, or replace equipment based on actual system condition and heating or cooling needs.
Fifth: Improve Windows and Doors
Repair and weatherproof existing units before considering replacement when practical.
Sixth: Upgrade Appliances and Lighting
Replace aging or inefficient equipment when the expected benefits justify the cost.
This order is not universal, but it provides a useful starting point for many older homes.
Should You Replace Windows or Add Insulation First?
This is a common question when improving an older home.
In many situations, it makes sense to investigate insulation and air leakage before committing to expensive window replacement.
For example, if the attic has inadequate insulation and major air leaks, correcting those issues may provide a larger improvement than replacing windows.
However, window replacement may become a higher priority when windows are:
- Severely damaged
- Leaking water
- Difficult to operate
- Structurally deteriorated
- Beyond practical repair
The best decision depends on the condition of the entire building envelope rather than one component.
Common Mistakes in Older Home Energy Upgrades
Replacing Windows First
Window replacement can be expensive and may not address the home’s largest energy losses.
Adding Insulation Without Checking Moisture
Insulation should not be used to hide leaks or damp building materials.
Sealing the Home Without Considering Ventilation
Reducing uncontrolled airflow does not eliminate the need for appropriate ventilation.
Replacing HVAC Equipment Too Early
Major insulation and air-sealing improvements can change the home’s heating and cooling requirements.
Insulating Walls Without Understanding Their Construction
Older wall assemblies can respond differently to moisture than modern assemblies.
Ignoring Drainage
Foundation and roof water problems should be corrected before major energy upgrades.
Replacing Everything at Once
A staged improvement plan can make it easier to prioritize spending based on actual performance problems.
Older Home Energy Efficiency Checklist
Building Envelope
- Inspect attic insulation
- Seal major attic air leaks
- Check exterior wall construction
- Inspect basement or crawl space
- Seal and insulate rim joists
- Inspect windows
- Weatherstrip exterior doors
- Check exterior penetrations
Moisture and Ventilation
- Inspect the roof for leaks
- Check gutters and downspouts
- Review foundation drainage
- Check for condensation
- Monitor indoor humidity
- Inspect bathroom exhaust
- Inspect kitchen ventilation
- Consider combustion safety
Heating and Cooling
- Maintain HVAC equipment
- Replace or clean filters as appropriate
- Inspect accessible ductwork
- Seal duct leaks
- Check airflow
- Review thermostat controls
Water Heating
- Inspect the water heater
- Repair leaks
- Review temperature settings
- Insulate suitable accessible hot-water pipes
Electricity
- Upgrade suitable lighting
- Review aging appliances
- Reduce unnecessary standby power
- Monitor household energy use
When to Hire a Professional
Professional assistance is especially useful when:
- The home’s energy problems are difficult to identify.
- Wall insulation requires extensive retrofit work.
- The home has significant moisture problems.
- Major air sealing is planned.
- Combustion appliances are present.
- HVAC equipment needs replacement.
- The home has historic construction.
- You are planning a major renovation.
A professional energy assessment can help identify the highest-priority improvements and reduce the risk of investing in the wrong upgrade.
Final Thoughts
Making an older home more energy efficient does not require replacing everything that makes the property unique.
The most effective strategy is to treat the house as a complete system and address the largest performance problems first.
Start by identifying moisture issues, major air leaks, insulation deficiencies, HVAC problems, and other sources of unnecessary energy use. Then improve the building envelope before making major equipment decisions whenever practical.
Simple measures such as attic air sealing, insulation improvements, weatherstripping, duct repairs, lighting upgrades, and HVAC maintenance can often provide meaningful improvements without a full renovation.
For older or historic homes, preservation and energy efficiency should also be considered together. The right upgrade is one that improves comfort and energy performance without creating new moisture, ventilation, or durability problems.
A systematic, staged approach allows an older home to become more comfortable and efficient while preserving the features that make it worth keeping.