
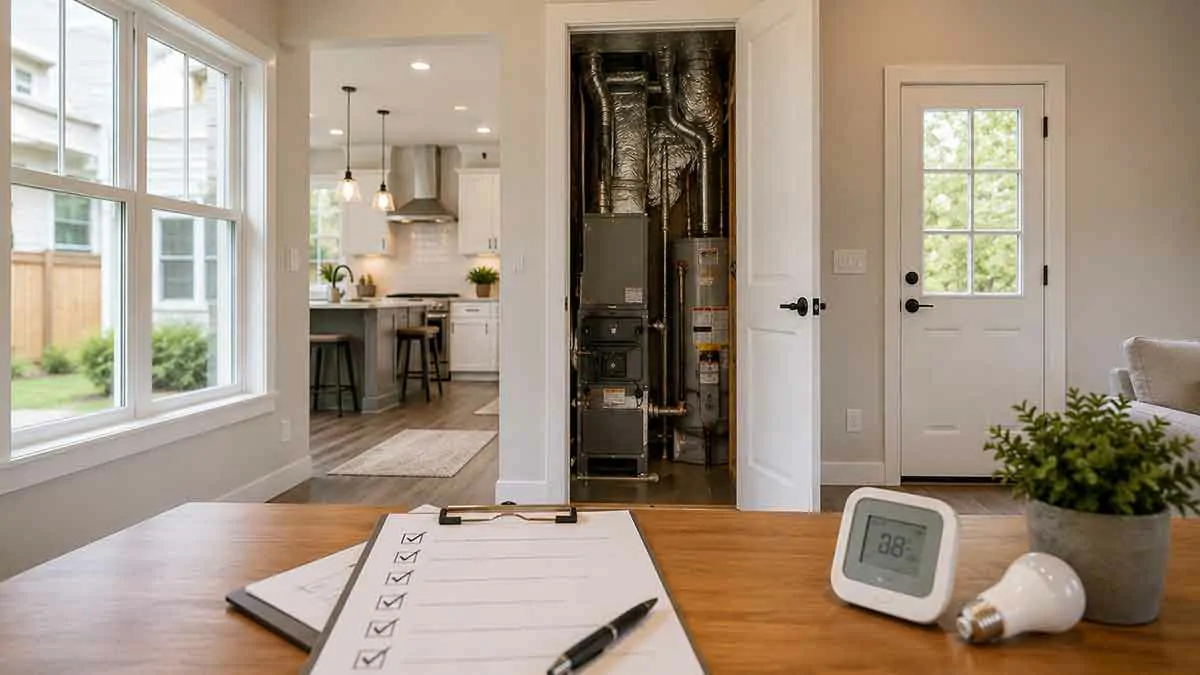
Improving your home’s energy efficiency does not always require expensive renovations or replacing major equipment. Many homes waste energy because of air leaks, inadequate insulation, inefficient heating and cooling, poor ductwork, outdated lighting, or simple maintenance issues.
A systematic home energy efficiency checklist can help you identify these problems and prioritize improvements based on their potential impact.
The most effective approach is to look at the home as a complete system. Insulation, air sealing, windows, HVAC equipment, ductwork, water heating, lighting, appliances, and ventilation all interact with one another.
This complete home energy efficiency checklist walks through the main areas to inspect, what problems to look for, which improvements should usually receive priority, and when professional testing may be worthwhile.
Table of Contents
What Is Home Energy Efficiency?
Home energy efficiency means using less energy to provide the same level of heating, cooling, lighting, hot water, and household services.
An energy-efficient home generally limits unnecessary heat transfer and air leakage while using equipment and systems effectively.
Important factors include:
- Insulation
- Air sealing
- Windows and doors
- HVAC systems
- Ductwork
- Water heating
- Lighting
- Appliances
- Ventilation
- Moisture control
- Building envelope design
Improving one component can sometimes affect the performance of others. For example, air sealing can reduce heating and cooling loads, while better insulation can help a home maintain a more stable indoor temperature.
Why Home Energy Efficiency Matters
Improving energy efficiency can provide several practical benefits.
Potential benefits include:
- Lower heating and cooling demand
- More consistent indoor temperatures
- Reduced drafts
- Improved comfort
- Less heat transfer
- Better HVAC performance
- Lower household energy consumption
- Improved building-envelope performance
Energy efficiency improvements can also make it easier to identify building problems before they become expensive repairs.
The goal should not be to make every possible upgrade. Instead, identify the largest problems and address them in a logical order.
1. Review Your Energy Bills
Start by reviewing your recent utility bills.
Look for:
- Unusually high energy consumption
- Seasonal increases
- Sudden changes in usage
- Higher heating costs
- Higher cooling costs
- Changes after renovations or equipment replacements
Energy bills alone cannot identify the exact cause of energy waste, but they can reveal patterns worth investigating.
If consumption is consistently high, compare the home’s insulation, air leakage, HVAC systems, and usage patterns before deciding which upgrade to make.
2. Check for Air Leaks
Air leakage can significantly affect comfort and energy performance.
Inspect common leakage locations such as:
- Windows
- Exterior doors
- Attic hatches
- Baseboards
- Electrical outlets
- Plumbing penetrations
- Utility openings
- Rim joists
- Duct penetrations
- Gaps around framing
Weatherstripping, caulking, or appropriate air-sealing materials can reduce uncontrolled airflow.
However, do not seal intentional ventilation openings or interfere with combustion-air requirements.
3. Inspect Attic Insulation
The attic is one of the highest-priority areas to inspect in many homes.
Check for:
- Missing insulation
- Thin insulation
- Uneven coverage
- Compressed insulation
- Damaged insulation
- Moisture
- Mold
- Roof leaks
- Air leakage
Before adding insulation, address significant air leaks and moisture problems.
Insulation should also be installed without blocking required attic ventilation pathways.
4. Check Wall Insulation
Wall insulation is usually hidden, making it more difficult to inspect.
Possible signs of inadequate wall insulation include:
- Cold exterior walls
- Uneven room temperatures
- Drafts near outlets
- Hot or cold spots
- High heating or cooling demand
During remodeling, inspect exposed wall cavities before closing them.
For finished walls, professional assessment methods may help determine whether insulation is missing or inconsistent.
5. Inspect Basement or Crawl Space
Basements and crawl spaces can have a major effect on the comfort of the rooms above them.
Check for:
- Missing insulation
- Air leakage
- Moisture
- Standing water
- Mold
- Foundation problems
- Uninsulated rim joists
- Duct losses
The correct insulation strategy depends on whether the space is conditioned, unconditioned, vented, or encapsulated.
Resolve moisture problems before adding insulation.
6. Check Floor Insulation
Floors above unconditioned areas can become uncomfortable and contribute to heat loss.
Inspect floors above:
- Crawl spaces
- Garages
- Unconditioned basements
- Porches
- Exterior spaces
Look for missing, compressed, or damaged insulation.
Also check for air leakage around penetrations and framing.
7. Inspect Windows
Windows can contribute to heat transfer and air leakage.
Check for:
- Damaged weatherstripping
- Cracked or deteriorated caulking
- Drafts
- Condensation
- Damaged frames
- Failed seals
- Poor operation
Do not automatically assume that replacing every window is the best energy-efficiency investment.
Repairing air leaks, improving weatherstripping, adding appropriate window treatments, or addressing insulation deficiencies may sometimes provide greater value.
8. Check Exterior Doors
Inspect exterior doors for:
- Worn weatherstripping
- Gaps around frames
- Damaged door sweeps
- Poorly sealed thresholds
- Air leakage
- Water intrusion
A poorly sealed exterior door can allow conditioned air to escape and outdoor air to enter.
Replacing worn seals can be a relatively simple improvement.
9. Inspect HVAC Equipment
Heating and cooling equipment can account for a significant portion of household energy use.
Check:
- Equipment condition
- Age
- Maintenance history
- Filters
- Thermostat
- Operating performance
- Unusual noises
- Uneven heating or cooling
An HVAC system that runs continuously does not automatically mean it needs replacement.
Building-envelope problems, duct losses, maintenance issues, and incorrect equipment sizing can also contribute to poor performance.
10. Check HVAC Filters
Dirty filters can restrict airflow and reduce system performance.
Check filters according to the equipment manufacturer’s recommendations.
A filter should be appropriate for the HVAC system rather than selected solely based on a higher filtration rating.
If airflow problems continue after replacing the filter, further HVAC evaluation may be necessary.
11. Inspect Ductwork
Ductwork can lose conditioned air when it is poorly sealed, damaged, or located in unconditioned spaces.
Inspect accessible ducts for:
- Loose connections
- Damaged insulation
- Missing insulation
- Air leaks
- Crushed sections
- Poorly sealed joints
Duct sealing and insulation can be particularly important when ducts pass through attics, crawl spaces, garages, or other unconditioned areas.
12. Check Thermostat Settings
Review heating and cooling settings.
Avoid unnecessarily extreme temperature settings when possible.
A programmable or smart thermostat may help manage temperature schedules, but thermostat upgrades cannot compensate for major insulation, air leakage, or HVAC problems.
The best settings depend on household preferences, climate, equipment, and occupancy.
13. Inspect Water Heating
Water heating can represent a meaningful portion of household energy consumption.
Check:
- Water heater age
- Energy source
- Condition
- Temperature setting
- Insulation where appropriate
- Hot water usage
- Leaks
When replacement is necessary, compare available systems based on efficiency, installation requirements, household demand, and operating cost.
14. Check Hot Water Pipes
Hot water pipes can lose heat before water reaches the fixture.
Where appropriate, inspect accessible hot water pipes for insulation.
Pipe insulation can be particularly useful in certain unconditioned areas.
Follow applicable safety requirements and keep insulation away from components that require clearance.
15. Review Lighting
Lighting is an easy area to evaluate.
Check for:
- Older inefficient bulbs
- Lights left on unnecessarily
- Excessive lighting
- Outdated controls
- Opportunities for LED upgrades
LED lighting can reduce electricity use compared with many older lighting technologies.
Also consider occupancy patterns rather than replacing functioning bulbs solely for the sake of replacement.
16. Evaluate Appliances
Review the home’s major appliances.
Consider:
- Age
- Energy use
- Condition
- Usage patterns
- Maintenance
- Efficiency
Common appliances to evaluate include:
- Refrigerator
- Freezer
- Dishwasher
- Clothes washer
- Clothes dryer
- Oven
- Other high-use equipment
Do not replace a functioning appliance automatically. Consider its remaining useful life and expected energy savings before purchasing a replacement.
17. Check Refrigerators and Freezers
Refrigerators and freezers operate continuously and can therefore contribute to household electricity use.
Check for:
- Damaged door seals
- Poor ventilation around the appliance
- Excessive frost
- Unusual operating behavior
- Dirty coils where accessible and appropriate
A damaged gasket can allow conditioned or room air to move into the appliance and increase energy use.
Follow the manufacturer’s maintenance instructions.
18. Reduce Standby Energy Use
Some electronic equipment consumes electricity even when it is not actively being used.
Review:
- Entertainment systems
- Computers
- Chargers
- Office equipment
- Smart devices
- Other electronics
Power management settings, switched power strips, and unplugging equipment that is rarely used can help reduce unnecessary standby consumption.
The potential savings vary by household and device.
19. Check Ventilation
Energy efficiency should not come at the expense of adequate ventilation.
Check whether the home has appropriate ventilation for:
- Bathrooms
- Kitchens
- Combustion appliances
- Living spaces
- Moisture-producing areas
Exhaust fans should discharge appropriately rather than venting moisture into attics or wall cavities.
If the home is being substantially air-sealed, consider whether ventilation needs to be evaluated as part of the project.
20. Look for Moisture Problems
Moisture problems can damage insulation and building materials while affecting indoor comfort.
Inspect for:
- Water stains
- Condensation
- Mold
- Musty odors
- Damp insulation
- Roof leaks
- Plumbing leaks
- Foundation moisture
Correct the source of moisture before installing new insulation or sealing affected areas.
21. Check for Thermal Bridges
Thermal bridging occurs when heat moves through parts of a building assembly that have lower thermal resistance than surrounding insulation.
Common examples include:
- Wood framing
- Metal framing
- Structural connections
- Uninsulated sections
- Window and door transitions
Continuous insulation can reduce some thermal bridging, depending on the wall or roof assembly.
A complete building-envelope approach is more effective than focusing only on insulation thickness.
22. Inspect Exterior Shading
Windows can allow substantial solar heat gain during warm weather.
Check:
- Exterior shades
- Overhangs
- Awnings
- Shutters
- Trees
- Interior blinds
- Window orientation
Reducing unwanted solar heat gain can lower cooling demand in appropriate climates.
At the same time, solar exposure can provide useful passive heating in colder conditions, so shading decisions should consider the local climate and season.
23. Check Attic Ventilation
Attic ventilation should be evaluated together with insulation and air sealing.
Look for:
- Blocked ventilation pathways
- Damaged vents
- Moisture
- Condensation
- Improperly vented exhaust fans
- Insulation blocking intended airflow
Do not add insulation in a way that blocks required ventilation.
The correct attic design depends on the roof assembly and climate.
24. Review Garage and Attached Spaces
Attached garages can affect the home’s energy performance.
Check the shared boundary for:
- Air leaks
- Missing insulation
- Gaps
- Unsealed penetrations
- Poorly sealed doors
- HVAC ducts
The garage should remain appropriately separated from conditioned living spaces.
Do not allow garage air to enter the home through uncontrolled openings.
25. Consider a Home Energy Audit
If you are unsure where energy is being lost, a professional home energy audit can provide more useful information than a visual inspection alone.
Depending on the service, an audit may include:
- Blower-door testing
- Infrared imaging
- Insulation inspection
- Air leakage assessment
- HVAC evaluation
- Duct inspection
- Moisture assessment
An audit can help identify the highest-priority improvements and reduce the risk of spending money on low-impact upgrades.
How to Prioritize Energy Efficiency Improvements
You do not need to complete every improvement at once.
A practical priority sequence is:
Step 1: Fix Moisture Problems
Repair roof leaks, plumbing leaks, foundation moisture, and other water problems.
Step 2: Address Major Air Leaks
Seal significant uncontrolled openings while maintaining required ventilation and safety clearances.
Step 3: Improve Insulation
Upgrade attic, wall, floor, basement, or crawl space insulation where deficiencies are identified.
Step 4: Improve HVAC Distribution
Inspect and seal ductwork, especially in unconditioned areas.
Step 5: Maintain or Upgrade HVAC Equipment
Repair maintenance issues and consider replacement when equipment is inefficient, unreliable, or near the end of its useful life.
Step 6: Address Windows and Doors
Repair significant air leaks and replace components when their condition or performance justifies the investment.
Step 7: Evaluate Appliances and Lighting
Upgrade inefficient equipment when replacement makes financial and practical sense.
This sequence is a starting framework rather than a universal rule. Climate, home construction, equipment condition, and project plans can change the appropriate order.
Quick Home Energy Efficiency Checklist
Use this list for a basic home inspection:
Building Envelope
- Check attic insulation
- Inspect wall insulation where accessible
- Check floor insulation
- Inspect basement or crawl space
- Check rim joists
- Look for air leaks
- Check thermal bridges
- Inspect windows
- Inspect exterior doors
HVAC
- Check filters
- Inspect HVAC equipment
- Review thermostat settings
- Inspect accessible ductwork
- Check duct insulation
- Schedule maintenance when needed
Water Heating
- Inspect water heater
- Check for leaks
- Review temperature settings
- Inspect accessible hot water pipes
- Consider system efficiency before replacement
Lighting and Appliances
- Review lighting
- Replace inefficient bulbs when appropriate
- Check refrigerator seals
- Review major appliance energy use
- Reduce unnecessary standby consumption
Moisture and Ventilation
- Check for roof leaks
- Check for plumbing leaks
- Look for condensation
- Inspect for mold or damp materials
- Check bathroom exhaust
- Check kitchen ventilation
- Avoid blocking required ventilation
Professional Assessment
- Review energy bills
- Consider a home energy audit
- Consider blower-door testing
- Consider infrared inspection
- Prioritize improvements based on findings
Common Energy Efficiency Mistakes
Replacing Windows First
Windows are visible, but they are not always the largest source of energy loss.
Evaluate insulation and air leakage before committing to expensive window replacement.
Adding Insulation Without Air Sealing
Air can bypass insulation through gaps and penetrations.
Air sealing and insulation should be considered together.
Ignoring Moisture
Adding insulation over a moisture problem can conceal the source and increase the risk of damage.
Focusing Only on R-Value
The rated R-value of insulation is only one part of overall building performance.
Installation quality, framing, thermal bridging, air leakage, and moisture also matter.
Replacing HVAC Equipment Without Evaluating the Building Envelope
A poorly insulated or leaky home can place unnecessary demand on heating and cooling equipment.
Evaluate the building envelope and HVAC system together when practical.
Sealing Every Opening
Not every opening is an unwanted air leak.
Required ventilation and combustion-air pathways must remain functional.
Making Every Upgrade at Once
A long list of efficiency improvements can become expensive quickly.
Prioritize projects based on energy impact, cost, urgency, and compatibility with other work.
When to Hire a Professional
Professional assistance may be worthwhile when:
- Energy bills remain unusually high.
- The home has persistent comfort problems.
- Major air leaks are difficult to locate.
- Insulation levels are unknown.
- Moisture problems are present.
- The home has combustion appliances.
- HVAC performance is questionable.
- Extensive insulation work is planned.
- Major renovations are underway.
- You want diagnostic testing before investing in upgrades.
A qualified energy professional can evaluate the building as a complete system rather than focusing on one isolated component.
Final Thoughts
Improving home energy efficiency starts with identifying where energy is being lost and which improvements are likely to provide the greatest practical benefit.
Use this home energy efficiency checklist to review the attic, insulation, air leakage, windows, doors, HVAC equipment, ductwork, water heating, lighting, appliances, ventilation, and moisture conditions.
Do not assume that the most expensive upgrade is automatically the best one. A relatively simple air-sealing or insulation improvement may sometimes provide more value than replacing a major component.
The most effective strategy is to evaluate the home as a complete system, correct moisture and major air-leakage problems first, improve insulation where deficiencies exist, maintain HVAC equipment, and then consider additional upgrades based on their expected benefits.
A structured approach can improve comfort, reduce unnecessary energy use, and help you invest in the parts of your home that matter most.