
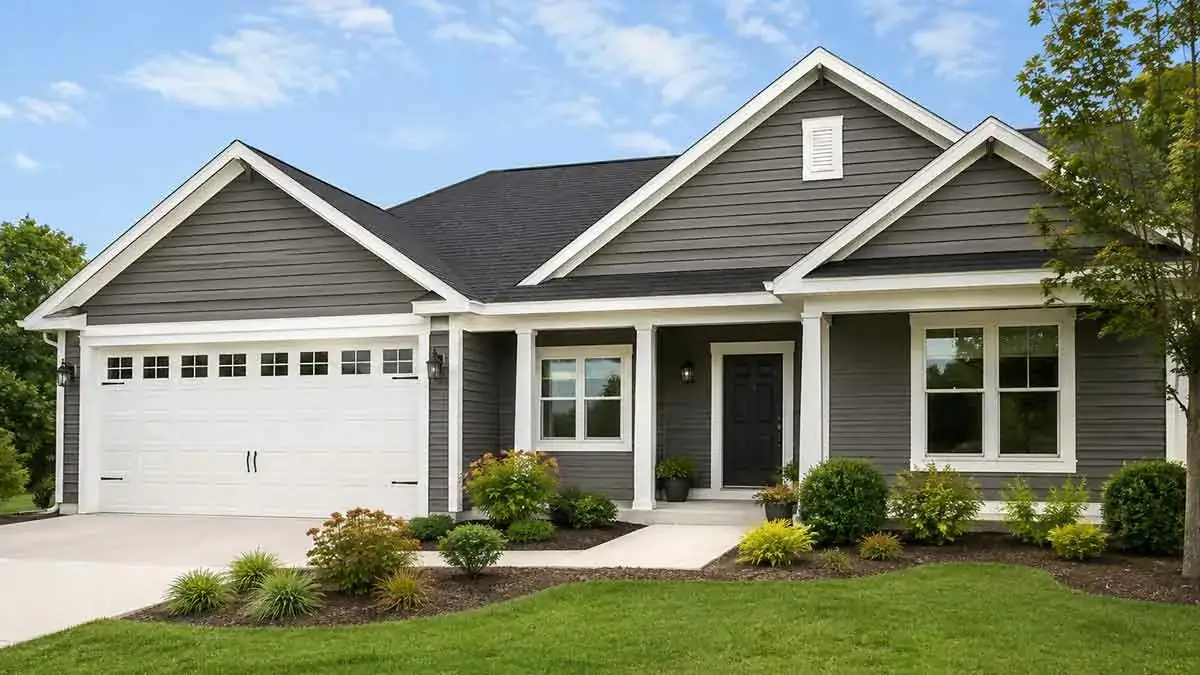
Exterior house painting is one of the most effective ways to refresh a home’s appearance, protect suitable exterior surfaces, and improve curb appeal. A properly planned paint job can make an older home look cleaner and more updated while helping exterior materials withstand normal exposure to sunlight, moisture, wind, and changing temperatures.
However, painting a house exterior involves much more than choosing a color and applying paint. Surface preparation, repairs, primer, paint type, finish, weather conditions, application techniques, and maintenance all affect the quality and longevity of the finished result.
Before starting, it is also important to determine whether the existing exterior is actually suitable for painting. Damaged siding, rotting wood, persistent moisture, failing caulk, rust, or structural problems should be addressed before new paint is applied.
This complete exterior house painting guide explains how to assess your home, choose exterior paint and colors, prepare different surfaces, plan the work, estimate costs, decide between DIY and professional painting, avoid common mistakes, and maintain the finished exterior.
Table of Contents
Why Paint Your House Exterior?
Exterior paint serves both an aesthetic and protective purpose.
When the existing exterior surface and coating are in suitable condition, a properly selected and applied paint system can help protect surfaces from normal weather exposure while improving the home’s appearance.
Common reasons to paint a house exterior include:
- Refreshing faded colors
- Improving curb appeal
- Updating an outdated exterior
- Protecting suitable painted surfaces
- Covering minor cosmetic imperfections
- Coordinating the exterior with new improvements
- Preparing a property for sale
- Maintaining the appearance of older siding or trim
Painting is most effective when the underlying exterior materials are structurally sound and properly prepared.
A new coat of paint should not be used to conceal significant water damage, rot, structural problems, or deteriorated siding.
Signs Your House Needs Exterior Painting
The condition of the existing coating is usually more useful than following a rigid repainting schedule.
Signs that your home may need exterior painting include:
- Peeling paint
- Flaking or cracking
- Significant fading
- Chalking
- Exposed substrate
- Worn areas around windows and doors
- Deteriorated trim
- Patchy or uneven previous paint
- Visible surface wear
However, these signs can sometimes indicate a problem underneath the coating.
For example, repeated peeling may be caused by moisture intrusion, poor surface preparation, incompatible coatings, or persistent exposure to water.
Identify and correct the underlying problem before repainting.
How Often Should You Paint a House Exterior?
There is no universal repainting interval for every house.
The lifespan of an exterior paint job depends on:
- Climate
- Sun exposure
- Rain and humidity
- Surface material
- Paint quality
- Surface preparation
- Application quality
- Maintenance
- Exposure to temperature changes
Wood siding may require more frequent maintenance than some other exterior materials.
The best approach is to inspect the exterior periodically instead of repainting only because a specific number of years has passed.
If the coating remains intact and the surface is performing well, repainting may not be immediately necessary.
Can Every Exterior Surface Be Painted?
Not every exterior material should be treated in exactly the same way.
Paintability depends on the surface, its condition, existing coatings, and the manufacturer’s recommendations.
Common paintable exterior surfaces can include:
- Wood siding
- Fiber cement siding
- Certain metal surfaces
- Previously painted masonry
- Exterior trim
- Wood doors
- Certain composite materials
Vinyl and other manufactured siding products may have specific requirements regarding paint color, product type, and application.
Before painting any exterior material, check the manufacturer’s instructions and confirm that the selected coating is appropriate.
How to Choose Exterior House Paint
Exterior paint is formulated to withstand outdoor conditions that interior paint does not normally experience.
When selecting a product, consider:
- Exterior surface material
- Climate
- Sun exposure
- Moisture exposure
- Existing coating
- Desired appearance
- Paint finish
- Manufacturer requirements
Do not choose paint based on color alone.
The coating must also be compatible with the surface and environmental conditions.
Acrylic Exterior Paint
Acrylic exterior paint is widely used for many residential applications.
Depending on the formulation, it can provide:
- Good adhesion
- Flexibility
- Weather resistance
- Color availability
- Relatively easy application
Always confirm that the specific product is designed for the intended exterior surface.
Exterior Latex Paint
Many modern exterior latex products use acrylic-based formulations.
They are commonly available for residential exterior applications and can provide a practical combination of durability and ease of application.
The term “latex” does not by itself determine whether a product is suitable. Always review the product specifications.
Specialty Exterior Coatings
Certain materials may require specialized coatings.
These can include coatings designed for:
- Masonry
- Metal
- Previously coated surfaces
- Specific wood applications
- High-moisture environments
- Other specialized substrates
Use the coating system recommended for the particular surface.
Choosing the Right Paint Finish
Paint sheen affects appearance, durability, and cleanability.
Common exterior finishes include:
- Flat
- Matte
- Satin
- Semi-gloss
- Gloss
Flat or Matte Finish
Low-sheen finishes can provide a traditional appearance and may be useful for large exterior surfaces.
They generally create less visual reflection but may not be as easy to clean as higher-sheen finishes.
Satin Finish
Satin can provide a balance between appearance and cleanability.
It is commonly considered for exterior surfaces where some durability and a moderate amount of sheen are desired.
Semi-Gloss Finish
Semi-gloss is often used for:
- Exterior trim
- Doors
- Shutters
- Architectural details
Its higher sheen can emphasize details and make the surface easier to clean.
Gloss Finish
Gloss finishes create stronger visual reflection and are generally better suited to selected accents rather than large wall surfaces.
Always follow the paint manufacturer’s recommendations for the intended surface.
Choosing Exterior House Colors
Exterior color has a major influence on the appearance of a home.
Before selecting colors, consider:
- Roof color
- Brick
- Stone
- Window frames
- Existing architectural details
- Landscaping
- Neighboring homes
- Amount of sunlight
- Architectural style
A simple exterior color scheme often includes:
- Main body color
- Trim color
- Accent color
The body color covers the largest surface area, while trim and accent colors highlight selected architectural features.
Light Exterior Colors
Light colors can create a bright and clean appearance.
They can also make a home appear visually larger.
Dark Exterior Colors
Dark colors can create a dramatic or contemporary appearance.
However, color performance can vary with the product, surface, and amount of sun exposure.
Neutral Exterior Colors
White, gray, beige, taupe, and muted earth tones are versatile choices that can work with many architectural styles.
How Many Exterior Paint Colors Should You Use?
Using too many exterior colors can make a house look visually fragmented.
A simple three-color approach can work well:
- One dominant body color
- One trim color
- One accent color
The exact number should depend on the home’s architecture.
A house with many architectural details may naturally require more visual variation, while a simple exterior may look best with fewer colors.
How to Test Exterior Paint Colors
Exterior colors can look very different under changing daylight.
Before purchasing enough paint for the entire house:
- Select several potential colors.
- Apply samples to small exterior areas.
- Observe them at different times of day.
- Compare them against the roof and permanent materials.
- Check the colors in direct and indirect light.
- Make the final selection only after evaluating the samples.
Do not rely exclusively on a small printed color card.
Testing the actual product on the actual exterior surface provides a much better indication of the final appearance.
Inspect the Exterior Before Painting
A detailed inspection should come before cleaning or painting.
Look for:
- Rotting wood
- Cracked surfaces
- Loose siding
- Damaged trim
- Failed caulk
- Mold or mildew
- Water stains
- Rust
- Previous coating failure
- Loose fasteners
- Damaged exterior components
Painting over these problems can lead to premature failure.
Repair significant defects before beginning the painting process.
Check for Moisture and Water Damage
Moisture is one of the most important issues to investigate before exterior painting.
Look for possible problems around:
- Windows
- Doors
- Roof edges
- Gutters
- Downspouts
- Siding joints
- Exterior penetrations
- Foundation areas
If water is entering behind the exterior surface, repainting will not solve the problem.
Correct the source of moisture first and allow affected materials to dry appropriately.
Clean the Exterior
Paint adheres better to surfaces that are clean and properly prepared.
Remove:
- Dirt
- Dust
- Cobwebs
- Loose debris
- Mold
- Mildew
- Chalky residue
- Loose coating
Depending on the surface, cleaning may involve:
- Garden hoses
- Exterior cleaning solutions
- Soft brushes
- Pressure washing
Pressure washing should be performed carefully.
Excessive pressure can damage wood, siding, trim, seals, and other components.
Allow the surface to dry thoroughly before proceeding.
Remove Loose and Peeling Paint
New paint should be applied over a stable substrate.
Use appropriate scraping tools to remove loose, peeling, or flaking coating.
After scraping, smooth rough edges where necessary.
The goal is to create a stable transition between the existing coating and exposed or repaired areas.
Do not simply paint over actively peeling areas.
Repair Damaged Surfaces
Painting should never replace necessary repairs.
Depending on the exterior material, repairs may include:
- Replacing rotten wood
- Repairing cracks
- Replacing damaged trim
- Securing loose siding
- Treating surface rust
- Replacing failed caulk
- Repairing damaged masonry
If the damage is extensive, professional evaluation may be appropriate before painting begins.
Sand and Smooth Surfaces
Sanding can help smooth rough transitions and prepare certain surfaces for a new coating.
It may be useful after:
- Scraping peeling paint
- Repairing wood
- Filling imperfections
- Replacing trim
The appropriate sanding method depends on the surface and existing coating.
Avoid aggressive methods that could damage the substrate or create unnecessary dust.
Caulk Gaps and Joints
Exterior-rated caulk can help seal appropriate joints and create cleaner transitions.
Common applications include:
- Window trim
- Door trim
- Exterior molding
- Certain siding joints
- Small gaps around suitable penetrations
Use a product appropriate for the specific exterior application.
Do not seal openings that are intentionally designed for drainage, ventilation, or moisture management.
When to Use Exterior Primer
Primer is useful in many painting situations, but full priming is not automatically required for every repainting project.
Primer may be appropriate when:
- Bare material is exposed
- Repairs have been completed
- The substrate is porous
- Existing coating is unstable
- A major color change is being made
- The surface requires a specialized primer
- The selected paint system specifically requires it
Follow the paint and primer manufacturer’s recommendations.
Prepare the Right Painting Tools
The tools required depend on the size and complexity of the project.
Common tools include:
- Paint brushes
- Rollers
- Paint trays
- Extension poles
- Scrapers
- Sanding tools
- Caulking tools
- Drop cloths
- Painter’s tape
- Ladders
- Scaffolding where appropriate
A sprayer may be useful for certain large projects, but it requires proper preparation, masking, technique, and overspray control.
Exterior Painting Safety
Exterior painting can involve elevated work, ladders, tools, chemicals, and changing weather conditions.
Basic precautions include:
- Use stable ladders
- Keep ladders on appropriate surfaces
- Maintain safe working positions
- Use suitable protective equipment
- Keep children and pets away from the work area
- Follow product safety instructions
- Avoid unsafe weather conditions
- Use appropriate fall protection when required
For multi-story or difficult-to-access homes, professional equipment and expertise may make the project significantly safer.
Choose the Right Weather Conditions
Weather has a major effect on exterior paint application and drying.
Avoid painting during conditions that are:
- Rainy
- Extremely hot
- Extremely cold
- Excessively humid
- Very windy
Direct sunlight can also cause some coatings to dry too quickly.
Always follow the manufacturer’s requirements for:
- Temperature
- Humidity
- Surface temperature
- Rain exposure
- Recoating time
A suitable period of dry weather is generally preferable.
Protect Windows, Doors, Plants, and Other Areas
Protect areas that should not receive paint.
These may include:
- Windows
- Doors
- Walkways
- Plants
- Outdoor furniture
- Exterior lighting
- Hardware
- Driveways
Use suitable coverings and masking techniques.
Move portable items away from the work area before painting begins.
Exterior House Painting Process
A typical exterior painting project follows this general sequence:
- Inspect the exterior.
- Identify moisture and structural problems.
- Complete necessary repairs.
- Clean the surfaces.
- Remove loose paint.
- Sand or smooth problem areas.
- Caulk appropriate joints.
- Prime areas where required.
- Protect surrounding surfaces.
- Paint large exterior surfaces.
- Paint trim and architectural details.
- Paint doors and selected accents.
- Inspect the finished work.
- Remove masking and protective materials.
- Clean the work area.
The exact sequence can vary according to the home’s construction and the products being used.
How to Paint Exterior Walls
Large exterior wall surfaces require consistent application.
When painting:
- Work in manageable sections.
- Maintain a consistent application method.
- Avoid allowing edges to dry unevenly where possible.
- Follow recommended coverage rates.
- Do not apply excessive thickness.
- Maintain appropriate drying and recoating times.
The best technique depends on the siding material and paint product.
How to Paint Exterior Trim
Trim often benefits from a different sheen or color than the main exterior.
Common trim areas include:
- Window surrounds
- Door frames
- Fascia
- Decorative molding
- Shutters
- Architectural details
Because trim contains many edges and smaller surfaces, careful brushwork can produce a cleaner result.
How to Paint Exterior Doors
Exterior doors receive frequent use and exposure.
Before painting:
- Clean the door.
- Repair surface damage.
- Remove or protect hardware.
- Sand where appropriate.
- Prime when required.
- Apply the appropriate exterior coating.
- Allow adequate drying time before normal use.
The coating should be compatible with the door material.
How to Paint Different Siding Materials
Different siding materials require different preparation and coating systems.
Wood Siding
Wood should be checked for:
- Rot
- Moisture
- Peeling paint
- Cracks
- Surface deterioration
Damaged wood should be repaired or replaced before painting.
Fiber Cement Siding
Fiber cement should be prepared and painted according to the manufacturer’s recommendations.
The existing finish and condition determine whether priming or additional preparation is necessary.
Metal Siding
Metal surfaces should be checked for:
- Rust
- Loose coating
- Corrosion
- Surface contamination
Use a coating system compatible with the metal substrate.
Vinyl Siding
Vinyl siding has specific considerations regarding paint selection and color.
Some manufacturers recommend limits on darker colors because of heat absorption and potential material movement.
Always follow the siding manufacturer’s recommendations.
How Many Coats of Exterior Paint Are Needed?
There is no universal number of coats for every project.
The required coverage depends on:
- Existing color
- New color
- Surface condition
- Paint product
- Primer
- Substrate
- Manufacturer specifications
One coat may be adequate in some applications, while two or more coats may provide the recommended coverage in others.
Do not assume that adding more coats automatically produces a better result.
Follow the manufacturer’s recommended coverage and recoating instructions.
How Long Does Exterior Paint Take to Dry?
Drying time depends on:
- Paint formulation
- Temperature
- Humidity
- Air movement
- Surface temperature
- Number of coats
A surface can feel dry while the coating is still curing.
Follow the manufacturer’s instructions for:
- Touch-dry time
- Recoat time
- Exposure to moisture
- Full curing
Avoid exposing freshly painted surfaces to rain or other conditions that could damage the coating.
Exterior House Painting Cost
The cost of painting a house exterior varies considerably from one property to another.
Major factors include:
- Home size
- Number of stories
- Surface material
- Surface condition
- Amount of preparation
- Paint type
- Number of coats
- Trim complexity
- Accessibility
- Labor rates
- Equipment requirements
Preparation can represent a substantial part of the total cost.
A house requiring extensive scraping, repairs, caulking, or priming may cost considerably more to paint than a well-maintained home with sound surfaces.
What Affects Exterior Painting Cost?
When comparing estimates, consider the entire scope of work rather than the headline price.
Ask whether the estimate includes:
- Surface preparation
- Cleaning
- Scraping
- Repairs
- Caulking
- Primer
- Number of coats
- Paint brand and product line
- Trim painting
- Equipment
- Cleanup
- Warranty
Two estimates with very different prices may not be offering the same level of preparation or materials.
How to Save Money on Exterior Painting
A lower project cost does not necessarily mean choosing the cheapest paint or contractor.
Practical ways to control costs include:
- Repair problems before they become extensive.
- Compare several detailed estimates.
- Keep sound existing materials when appropriate.
- Choose a durable product suited to the surface.
- Complete related preparation work together.
- Paint only areas that actually require repainting.
- Handle suitable preparation or cleanup yourself if appropriate.
- Schedule the project under favorable weather conditions.
Avoid reducing preparation quality simply to lower the initial price.
Poor preparation can result in premature coating failure and higher long-term costs.
DIY Exterior Painting vs. Hiring a Professional
DIY exterior painting can be suitable for some homeowners.
It may make sense when:
- The home is relatively low.
- Surfaces are easy to access.
- Repairs are limited.
- The project is manageable.
- You have the necessary tools and time.
Professional painting may be preferable for:
- Multi-story homes
- Large exterior surfaces
- Extensive preparation
- Difficult access
- Significant repairs
- Specialized coatings
- Projects where safety is a concern
DIY work can reduce labor costs, but the homeowner is responsible for preparation, equipment, safety, application, and cleanup.
When to Hire a Professional Painter
Professional assistance is strongly worth considering when the project involves:
- Tall exterior walls
- Complex rooflines
- Difficult ladder access
- Significant wood rot
- Extensive surface repairs
- Large-scale scraping
- Specialized coatings
- Structural or moisture problems
- Work requiring specialized equipment
If structural, electrical, or significant water-related problems are discovered, use the appropriate qualified professional rather than treating the issue as a simple painting task.
Common Exterior House Painting Mistakes
Painting Over Dirt
Paint should not be applied over dirty or contaminated surfaces.
Clean and prepare the substrate first.
Painting Over Peeling Coating
New paint will not reliably fix an unstable underlying coating.
Remove loose material and prepare the surface properly.
Ignoring Moisture Problems
Repeated peeling or blistering can be related to moisture.
Find and correct the source before repainting.
Skipping Necessary Repairs
Rot, cracks, damaged siding, and deteriorated trim should be addressed before painting.
Choosing Paint Only by Color
A visually attractive color is not enough.
The product must also be appropriate for the surface and environment.
Painting in Poor Weather
Rain, extreme temperatures, high humidity, and strong wind can interfere with application and drying.
Applying Excessively Thick Coats
More paint is not necessarily better.
Excessive application can create drying and finish problems.
Follow the manufacturer’s coverage recommendations.
Ignoring Trim
Painting the main exterior while leaving badly faded or damaged trim can produce an unfinished appearance.
Poorly Protecting Surrounding Areas
Overspray and drips can damage windows, landscaping, walkways, and other surfaces.
Rushing the Preparation
Preparation is often the difference between a short-lived paint job and a durable one.
How to Maintain Exterior Paint
Proper maintenance can help extend the useful life of an exterior coating.
Regularly:
- Inspect painted surfaces.
- Clean accumulated dirt.
- Remove vegetation touching exterior walls.
- Check caulk around appropriate joints.
- Inspect for peeling or cracking.
- Look for moisture problems.
- Keep gutters and downspouts functioning properly.
- Repair small coating failures before they spread.
Early maintenance can prevent minor problems from becoming larger repairs.
When to Repaint Your House Exterior
Repainting should be based primarily on the condition of the coating and substrate.
Consider repainting when you notice:
- Widespread peeling
- Significant fading
- Persistent cracking
- Exposed substrate
- Extensive chalking
- Repeated coating failure
- A need to update the home’s appearance
If the paint is failing unusually quickly, investigate the cause before applying another coat.
The problem may involve moisture, poor preparation, incompatible products, or substrate deterioration.
Exterior House Painting Checklist
Before starting an exterior painting project, confirm that you have considered:
- Exterior surface condition
- Moisture problems
- Structural repairs
- Existing coating
- Surface cleaning
- Peeling paint removal
- Surface repairs
- Sanding
- Caulking
- Primer requirements
- Paint type
- Paint finish
- Exterior color
- Weather conditions
- Tools and equipment
- Ladder or access requirements
- Safety equipment
- Protection for windows and landscaping
- Number of coats
- Drying and recoating times
- Project budget
- Contractor estimates if applicable
- Long-term maintenance
Final Thoughts
Exterior house painting can significantly improve the appearance of a home while helping protect suitable exterior surfaces from normal weather exposure.
The most important part of the project is not simply applying the final color. A durable result depends on inspecting the exterior, correcting moisture and surface problems, cleaning and preparing the substrate, selecting compatible products, and applying the coating under appropriate conditions.
Start by evaluating the condition of your home’s exterior. Repair problems before painting, choose a paint system appropriate for the surface, test colors in real outdoor lighting, and create a realistic budget that includes preparation as well as painting.
Whether you complete the project yourself or hire a professional, careful preparation and proper application can produce a cleaner, more durable exterior finish and help your home maintain its appearance for years to come.