
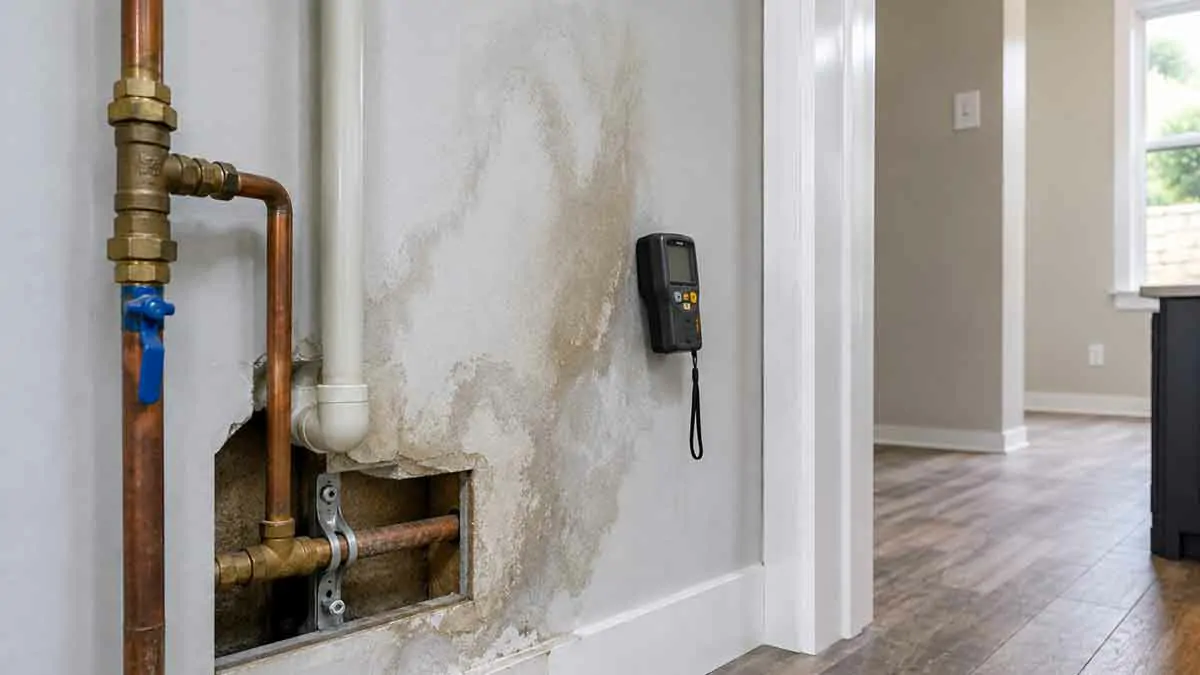
Water leaks are one of the most common plumbing problems in a home, and even a small leak can become expensive if it goes unnoticed. A dripping faucet may waste water gradually, while a hidden leak behind a wall, beneath a floor, or under a concrete slab can damage drywall, flooring, insulation, cabinets, and structural materials.
Learning how to find a water leak early can help reduce water waste, limit property damage, and prevent secondary problems such as mold and deteriorating building materials. The key is to determine whether the water is coming from a visible fixture, a plumbing connection, an appliance, a concealed pipe, or another source such as condensation or a roof leak.
This guide explains how to find and fix water leaks at home, including how to check common leak locations, use your water meter to identify unexplained water use, recognize hidden leaks, handle simple repairs, and determine when professional plumbing assistance is necessary.
Table of Contents
Why Water Leaks Happen
Water leaks can develop in almost any part of a home’s plumbing system.
Common causes include:
- Worn washers and seals
- Loose plumbing connections
- Corroded pipes
- Cracked pipes
- Damaged supply hoses
- Faulty valves
- Excessive water pressure
- Frozen pipes
- Aging plumbing
- Damaged plumbing fixtures
- Failed appliance connections
- Deteriorated underground pipes
- Tree-root intrusion in some drain or sewer systems
The visible location of water is not always the actual source. Water can travel through walls, ceilings, floors, and framing before becoming visible.
For that reason, finding the source is often more important than simply drying the area where water first appears.
Common Signs of a Water Leak
A plumbing leak does not always produce an obvious puddle.
Watch for signs such as:
- Unexplained increases in water consumption
- Damp walls
- Ceiling stains
- Bubbling or peeling paint
- Warped flooring
- Musty odors
- Mold or mildew growth
- Damp cabinets
- Water around plumbing fixtures
- Sounds of running water
- Unexpected changes in water pressure
- Toilets that continue running
A combination of several signs can make a hidden leak more likely.
The earlier you investigate unexplained moisture or water usage, the easier it may be to limit damage.
How to Find a Water Leak
Start with the simplest and most accessible checks.
A practical leak-detection process is:
- Check visible plumbing fixtures.
- Inspect appliance connections.
- Look for moisture, stains, or corrosion.
- Listen for unexplained water sounds.
- Check your water meter when no water is being used.
- Review your water bill for unusual consumption.
- Narrow the suspected location.
- Use appropriate detection tools when necessary.
- Contact a plumber if the source cannot be identified safely.
Do not immediately cut into walls or floors. A systematic inspection can often narrow the problem before any destructive investigation is necessary.
Check Visible Plumbing First
Begin with areas where plumbing is easy to access.
Inspect:
- Faucets
- Toilets
- Shower connections
- Sink plumbing
- Exposed pipes
- Water heaters
- Washing machine connections
- Dishwasher connections
- Refrigerator water lines
- Outdoor faucets
Use a flashlight to inspect dark cabinets and utility areas.
Look for:
- Drips
- Dampness
- Mineral deposits
- Corrosion
- Rust
- Water stains
- Wet insulation
- Standing water
A dry paper towel can also help identify very small leaks around accessible connections.
Check Under Sinks
Open the cabinets beneath kitchen and bathroom sinks.
Inspect:
- Faucet supply lines
- Shutoff valves
- Drain connections
- P-traps
- Flexible hoses
- Dishwasher connections
- Garbage-disposal connections
Place a dry paper towel around suspicious connections and check it after several minutes.
If the towel becomes wet, follow the moisture back toward the connection to identify the source.
Do not overtighten plumbing fittings in an attempt to stop a leak. Excessive force can damage seals or fittings.
Check Toilets
Toilets can develop both visible and hidden leaks.
Listen for:
- Periodic refilling
- Hissing sounds
- Water movement inside the tank
A simple dye test can help identify an internal toilet leak.
Add a small amount of food coloring to the toilet tank without flushing. Wait for a period of time and check the bowl.
If colored water appears in the bowl, water is passing from the tank into the bowl.
A leaking toilet can waste water continuously even when there is no visible puddle.
Check the Toilet Base
Moisture around the base of a toilet can indicate a failed seal, loose connection, damaged supply line, or another plumbing problem.
Check for:
- Water around the base
- Damp flooring
- Damaged caulking
- Soft flooring
- Toilet movement or rocking
Do not assume that water at the base always comes from the toilet seal. Water may originate from another connection and travel downward.
If the floor or subfloor is damaged, professional evaluation may be necessary.
Check the Water Heater
Inspect the area around your water heater for:
- Water beneath the unit
- Wet fittings
- Corrosion
- Dripping valves
- Damp insulation
- Rust-colored water
- Moisture around connections
A leak from a connection or valve may be repairable.
A leaking storage tank, particularly when corrosion is present, may require replacement.
Because water heaters can involve gas, electricity, high temperatures, and pressurized water, avoid complex repairs unless you have the appropriate training.
Check Washing Machine Hoses
Washing machine hoses operate under pressure and can deteriorate over time.
Inspect them for:
- Cracks
- Bulges
- Corrosion
- Loose connections
- Dampness
Check both the supply hoses and the drain connection.
Replace damaged hoses rather than relying on temporary patches.
Check Dishwasher Connections
Inspect the area beneath and around the dishwasher.
Potential leak sources include:
- Water supply connection
- Drain hose
- Pump area
- Door seal
- Connections beneath the sink
Water damage beneath a dishwasher can remain hidden for some time, so unexplained moisture or cabinet damage should be investigated promptly.
Check Refrigerator Water Lines
Refrigerators with ice makers or water dispensers may have a dedicated water supply line.
Inspect:
- Tubing
- Shutoff connection
- Appliance connection
- Flooring behind or beneath the refrigerator
Move the appliance carefully if inspection requires access behind it.
Inspect Outdoor Faucets
Outdoor faucets can leak from:
- Hose connections
- Valves
- Pipe joints
- Damaged faucet components
Check for moisture around the faucet and the surrounding wall or ground.
In cold climates, outdoor plumbing should also be protected against freezing because frozen water can damage vulnerable pipes.
Check the Main Water Line
The main water line supplies the home from a municipal system or private water source.
A leak in this line may produce:
- Unexpected water consumption
- Persistent wet soil
- Puddles
- Unusually green vegetation
- Soil erosion
- Low water pressure
- Unexplained water sounds
Underground main-line leaks can be difficult to locate and often require specialized equipment.
Use the Water Meter to Find a Leak
Your water meter can be one of the most useful tools for identifying an unexplained leak.
First, make sure the home is not using water.
Turn off:
- Faucets
- Showers
- Washing machines
- Dishwashers
- Irrigation systems
- Other water-consuming appliances
Make sure toilets have finished filling.
Then observe the water meter.
If the meter continues registering water use while everything is shut off, there may be a leak somewhere in the plumbing system.
Some meters also include a small leak indicator that moves when water is flowing.
The exact meter display varies, so consult the utility or meter manufacturer’s instructions if necessary.
Perform an Overnight Water Meter Test
An overnight test can make a small hidden leak easier to identify.
Before going to bed:
- Stop all water use.
- Make sure appliances are not operating.
- Check that toilets are not refilling.
- Record the meter reading.
- Avoid using water overnight.
- Check the meter again in the morning.
If the reading has changed significantly without intentional water use, investigate further.
Remember that some homes or systems may have automatic water use, such as irrigation equipment or appliances with water connections, so account for those before interpreting the result.
Look for Hidden Water Leaks
Hidden leaks can occur where plumbing is concealed behind building materials.
Potential warning signs include:
- Damp drywall
- Bubbling paint
- Peeling wallpaper
- Discolored walls
- Warped baseboards
- Musty odors
- Mold growth
- Damp flooring
- Unexplained ceiling stains
- Persistent moisture
A hidden leak may continue for days or weeks before becoming obvious.
Check Walls and Ceilings
Inspect walls and ceilings near bathrooms, kitchens, laundry areas, water heaters, and plumbing fixtures.
A ceiling stain can originate from:
- Plumbing above the ceiling
- A bathroom
- A shower
- A toilet
- A water supply pipe
- HVAC condensate
- A roof leak
The visible stain may not be directly beneath the source because water can travel along framing and other building materials.
Do not cut open a large section of drywall simply because you see a stain.
First identify the most likely source.
Check Floors and Cabinets
Hidden moisture can damage:
- Hardwood
- Laminate
- Subflooring
- Cabinets
- Baseboards
- Carpeting
Look for:
- Swelling
- Buckling
- Discoloration
- Soft spots
- Warping
- Musty odors
Pay particular attention to areas beneath sinks, appliances, toilets, and plumbing fixtures.
Listen for Running Water
When the house is quiet, listen for unusual water sounds.
Possible warning sounds include:
- Hissing
- Dripping
- Running water
- Ticking
- Water movement inside walls
If you hear water when all fixtures are turned off, investigate the plumbing system.
A sound alone does not prove that a leak exists, but it can help narrow the suspected area.
Check Water Pressure
Changes in water pressure can provide another clue.
A sudden reduction in pressure may be associated with:
- A leak
- A restricted valve
- A clogged filter
- Pipe deterioration
- Municipal supply problems
- Pressure-regulator problems
Pressure changes do not automatically indicate a leak, so use them together with other evidence.
Do not increase household water pressure simply to compensate for a suspected plumbing problem without determining the cause.
Review Your Water Bill
Your water bill can reveal changes that may not be obvious inside the home.
Compare recent usage with previous billing periods.
Look for:
- Unexplained increases
- Continuous increases
- Consumption when the home was vacant
- Changes that do not match household behavior
A higher bill can have many causes, including seasonal outdoor watering, but unexplained increases justify further investigation.
Common Hidden Water Leak Locations
Hidden leaks may occur:
- Inside walls
- Beneath floors
- Behind cabinets
- Behind appliances
- Under bathtubs
- Around showers
- Beneath toilets
- Inside ceilings
- Under concrete slabs
- Along underground supply lines
The location of visible moisture is not always the location of the damaged pipe.
How to Find a Leak Behind a Wall
If you suspect a leak behind a wall:
- Identify nearby plumbing fixtures.
- Look for dampness or discoloration.
- Listen for water movement.
- Check the water meter.
- Inspect nearby flooring and baseboards.
- Use a moisture meter if available.
- Consider professional leak detection before opening the wall.
The goal is to identify the likely source before creating unnecessary damage.
How to Find a Leak Under a Floor
Signs of a leak beneath flooring may include:
- Warped flooring
- Buckling
- Damp areas
- Musty odors
- Warm or unusual floor temperatures
- Unexplained water consumption
- Persistent moisture
A leak beneath flooring can be difficult to locate without specialized equipment.
If the suspected leak is beneath a finished floor, professional assessment may help identify the source before major demolition.
Slab Leaks
A slab leak occurs when a water pipe beneath or within a concrete foundation develops a leak.
Possible warning signs include:
- Unexplained water usage
- The sound of running water
- Damp flooring
- Warm spots on floors in some situations
- Reduced water pressure
- Persistent moisture
Slab leaks can be difficult to diagnose and repair because the plumbing is concealed beneath concrete.
Professional leak detection is generally appropriate when a slab leak is suspected.
Underground Water Line Leaks
Underground supply lines can leak beneath:
- Lawns
- Driveways
- Walkways
- Gardens
- Landscaping
Possible signs include:
- Persistent wet soil
- Unexplained puddles
- Unusually lush vegetation
- Soil erosion
- Low water pressure
- Unexpected water consumption
Specialized leak-detection methods may be necessary to identify the exact location.
Use a Moisture Meter
A moisture meter can help identify areas with unusually high moisture levels in materials such as:
- Drywall
- Wood
- Cabinets
- Flooring
It can be useful when investigating suspected hidden leaks.
However, a moisture meter identifies moisture; it does not necessarily identify the source.
Use readings together with visible evidence, plumbing layout, and other diagnostic information.
Professional Water Leak Detection
Professional plumbers may use specialized tools when a leak cannot be located through basic inspection.
Depending on the situation, methods can include:
- Acoustic leak detection
- Infrared inspection
- Moisture measurement
- Pressure testing
- Specialized electronic detection
- Camera inspection for appropriate plumbing systems
Professional detection can sometimes identify the source without opening large areas of walls or flooring.
How to Fix a Leaking Faucet
The correct repair depends on the faucet design and the failed component.
A leaking faucet may require:
- Washer replacement
- Cartridge replacement
- Seal replacement
- Valve repair
- Faucet replacement
Before disassembling a faucet:
- Shut off the water supply.
- Open the faucet to relieve pressure.
- Identify the faucet type.
- Inspect the internal components.
- Replace the damaged component.
- Reassemble the faucet.
- Restore water gradually.
- Check carefully for leaks.
If the faucet continues to leak, the valve body or another component may be damaged.
How to Fix a Leaking Pipe Connection
For an accessible leaking connection:
- Shut off the water.
- Relieve pressure.
- Dry the area.
- Identify the exact source.
- Inspect the fitting and seal.
- Replace damaged components when appropriate.
- Reconnect the fitting correctly.
- Restore water slowly.
- Check for leakage.
Avoid overtightening. Different plumbing connections require different sealing methods, and excessive force can damage fittings.
How to Fix a Leaking Supply Line
A damaged flexible supply line should generally be replaced rather than patched.
The basic process is:
- Shut off the water.
- Relieve pressure.
- Disconnect the damaged line.
- Install a compatible replacement.
- Tighten the connections appropriately.
- Restore water gradually.
- Check both connections for leaks.
If the shutoff valve itself is leaking or cannot be closed, professional assistance may be necessary.
How to Fix a Leaking Toilet
The repair depends on where the leak originates.
A tank leak may involve:
- Flapper
- Fill valve
- Tank seal
- Flush valve components
A leak at the base may involve the toilet seal or damaged flooring.
If the toilet rocks, the flooring is soft, or water continues appearing around the base, professional evaluation is recommended.
How to Fix a Leaking Shower
A shower leak can originate from:
- Showerhead
- Valve
- Supply pipe
- Drain
- Tub or shower enclosure
- Failed waterproofing
If water appears outside the shower area, do not assume that the showerhead is responsible.
Water may travel behind walls or beneath flooring.
A leak involving a concealed shower valve, supply pipe, or waterproofing system may require professional repair.
How to Fix a Leaking Drain Pipe
Common accessible drain leak locations include:
- P-traps
- Slip joints
- Drain connections
- Corroded pipe sections
A damaged section may need to be replaced.
Temporary tape or sealants should not be treated as permanent solutions for seriously damaged plumbing.
How to Fix a Leaking Water Heater
First identify where the water is coming from.
Potential sources include:
- Pipe connections
- Inlet or outlet fittings
- Drain valve
- Pressure-relief valve
- Tank
A leaking connection may be repairable.
If the storage tank itself is leaking, replacement may be necessary.
Water heaters can involve electricity, gas, high temperatures, and pressure. Use a qualified professional for repairs that exceed basic inspection or routine maintenance.
How to Fix a Pipe Inside a Wall
A concealed pipe leak is usually more complicated than an accessible plumbing repair.
The process may involve:
- Confirming the likely leak location.
- Shutting off the water.
- Creating controlled access to the damaged section.
- Removing the damaged pipe or fitting.
- Installing a compatible replacement.
- Pressure-testing or otherwise checking the repair.
- Drying affected materials.
- Repairing the wall after confirming the leak is resolved.
Professional assistance is recommended when the plumbing layout or repair method is uncertain.
How to Stop a Water Leak Temporarily
If a leak cannot be repaired immediately, the safest temporary response is often to shut off the water supply to the affected fixture or, when necessary, the home’s main water supply.
Temporary products may sometimes reduce leakage, but they should not be considered a substitute for proper repair.
The longer water remains uncontrolled, the greater the potential for damage to surrounding materials.
What to Do When You Discover a Major Leak
Act quickly when a significant leak occurs.
1. Shut Off the Water
Close the nearest fixture shutoff valve if possible.
If the leak is larger or the source is unknown, shut off the main water supply.
2. Protect Belongings
Move furniture, electronics, documents, and other valuables away from the water when it is safe.
3. Consider Electrical Hazards
Do not enter standing water near electrical outlets, appliances, wiring, or electrical equipment.
If electrical equipment has been exposed to water, use qualified assistance to determine whether it is safe.
4. Contact a Plumber
Major leaks, hidden leaks, and burst pipes should be addressed promptly.
5. Begin Water Removal
Remove standing water and begin appropriate drying as soon as it is safe.
Wet building materials may require professional water-damage assessment, particularly after significant or prolonged exposure.
Water Leak vs. Condensation
Not every wet surface is caused by a plumbing leak.
Condensation occurs when warm, moisture-laden air contacts a sufficiently cold surface.
It may appear around:
- Cold-water pipes
- Windows
- Air-conditioning components
- Ductwork
A useful investigation should determine whether the moisture is caused by:
- Plumbing leakage
- Condensation
- Roof intrusion
- Drainage problems
- Another water source
Treating condensation as a plumbing leak can lead to unnecessary repairs, while treating a real leak as condensation can allow damage to continue.
Water Leak vs. Roof Leak
A ceiling stain may originate from either plumbing or the roof.
Roof leaks are often associated with:
- Rain
- Storms
- Snow
- Ice
Plumbing leaks can occur regardless of weather.
Because water can travel through framing and building materials, the location where the stain appears may not identify the source.
If the stain appears after rain, inspect the roof and attic as well as nearby plumbing.
How to Prevent Water Leaks
Regular maintenance can reduce the likelihood of many plumbing leaks.
Inspect Visible Plumbing
Periodically check exposed pipes, valves, supply lines, and connections.
Look for corrosion, moisture, mineral deposits, and deterioration.
Replace Damaged Supply Hoses
Inspect flexible hoses connected to:
- Washing machines
- Dishwashers
- Toilets
- Sinks
- Other appliances
Replace hoses when they show signs of damage or according to manufacturer recommendations.
Monitor Water Pressure
Excessive water pressure can increase stress on plumbing components.
If pressure seems unusually high or changes unexpectedly, have the system evaluated rather than adjusting it without diagnosis.
Protect Pipes From Freezing
In cold climates:
- Insulate vulnerable pipes.
- Protect exposed plumbing.
- Maintain appropriate indoor temperatures.
- Follow appropriate winterization procedures.
Frozen water can expand and damage plumbing.
Maintain the Water Heater
Follow the manufacturer’s inspection and maintenance recommendations.
Check periodically for leaks, corrosion, and unusual changes in performance.
Repair Running Toilets
A running toilet can waste water continuously and may also indicate a worn internal component.
Repairing it promptly can reduce both water waste and the risk of additional problems.
Watch Your Water Usage
Monitoring water consumption can provide an early warning of hidden leaks.
Unexpected increases deserve investigation, especially when household water-use habits have not changed.
How Often Should You Check for Water Leaks?
A quick plumbing inspection every few months is a practical habit for most homeowners.
Pay particular attention to:
- Under sinks
- Toilets
- Water heaters
- Washing machine connections
- Dishwasher connections
- Refrigerator water lines
- Exposed pipes
- Utility areas
- Basement or crawl-space plumbing
Older homes or homes with aging plumbing may benefit from more frequent inspections.
Also check plumbing after major weather events, freezing conditions, renovations, or unusual changes in water consumption.
Common Water Leak Repair Mistakes
Ignoring Small Leaks
A small leak can gradually damage surrounding materials and waste water.
Using Tape as a Permanent Repair
Temporary materials may reduce leakage in some situations but do not replace proper pipe repair.
Overtightening Fittings
Excessive force can damage fittings, threads, seals, and valves.
Repairing Only the Visible Water
The location where water appears may not be the actual source.
Delaying Drying
Wet drywall, wood, flooring, and insulation can develop additional problems when moisture remains for too long.
Cutting Into Walls Too Quickly
Unnecessary demolition increases repair costs.
Use visual inspection, water-meter testing, moisture measurements, and professional detection methods when appropriate before opening large areas.
Using the Wrong Replacement Part
Plumbing components are not universally interchangeable.
Use compatible parts and follow the manufacturer’s instructions.
When to Call a Plumber
Professional assistance is appropriate when:
- The leak source cannot be identified.
- A pipe inside a wall is leaking.
- A pipe has burst.
- The main water line is leaking.
- A slab leak is suspected.
- Multiple fixtures are affected.
- A water heater has a significant leak.
- Plumbing is severely corroded.
- Water pressure changes unexpectedly.
- A sewer or underground line may be involved.
- Significant water damage has occurred.
- You cannot safely shut off the water.
Calling a professional early can be less expensive than allowing a hidden leak to continue damaging the property.
Water Leak Detection Checklist
Use this checklist when investigating unexplained water use or moisture:
- Check faucets
- Inspect under sinks
- Check toilets
- Inspect the toilet base
- Check the water heater
- Inspect washing machine hoses
- Check dishwasher connections
- Inspect refrigerator water lines
- Check outdoor faucets
- Inspect exposed pipes
- Look for ceiling stains
- Check walls for moisture
- Inspect floors and cabinets
- Listen for running water
- Check water pressure
- Review water bills
- Test the water meter
- Perform an overnight meter test
- Check for condensation
- Consider roof leakage
- Use a moisture meter when appropriate
- Contact a plumber if the source remains unknown
Final Thoughts
Knowing how to find and fix water leaks can help protect your home from water waste, property damage, and costly plumbing repairs.
Start with visible fixtures and accessible plumbing. Check under sinks, around toilets, near water heaters and appliances, and around exposed pipes. If there is no obvious source, use your water meter to determine whether water is flowing when the home is not intentionally using it.
Hidden leaks require more careful investigation. Damp walls, ceiling stains, warped flooring, musty odors, unexplained water consumption, and unusual water sounds can all provide clues. Moisture meters and professional leak-detection equipment can help locate concealed leaks without unnecessary demolition.
Simple problems such as leaking faucets, damaged supply lines, and worn toilet components may be suitable for basic DIY repair when you understand the system and can safely shut off the water. Leaks inside walls, beneath slabs, underground, or around complex plumbing systems are better handled by qualified professionals.
The most important rule is simple: find the source, control the water, repair the underlying problem, and dry affected materials promptly. Early action can prevent a minor leak from becoming major water damage.