
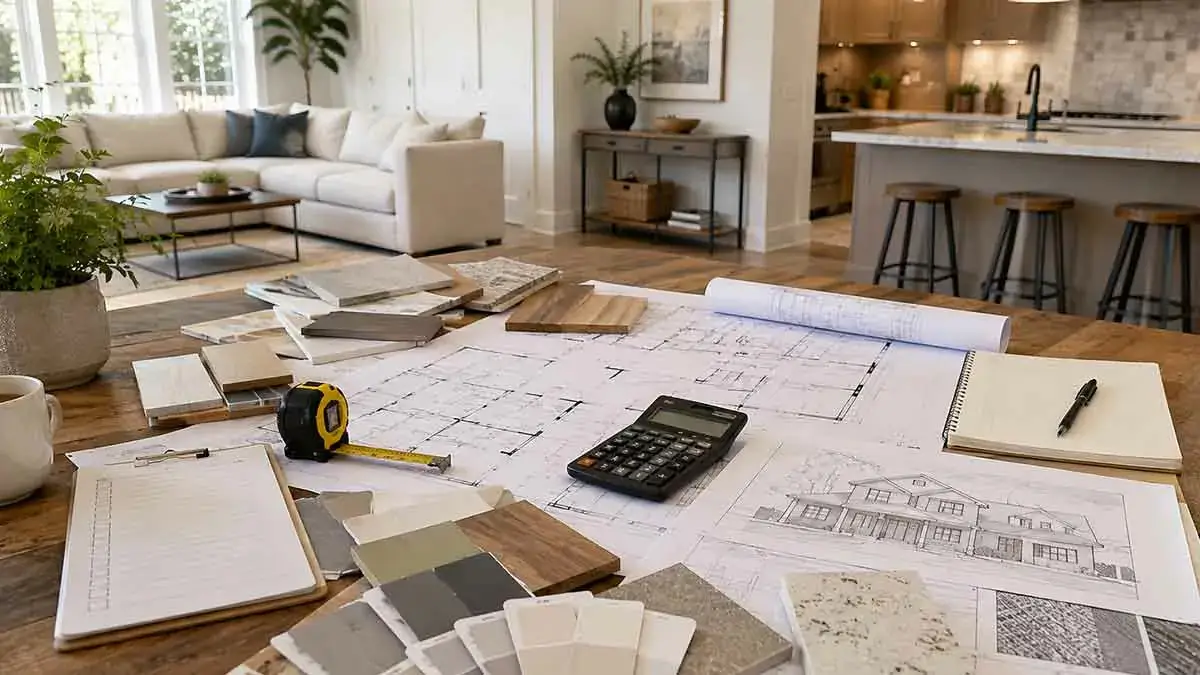
Planning a home renovation can feel overwhelming when you look at the entire project at once. There are design decisions to make, contractors to find, materials to choose, permits to obtain, and costs to control.
The easiest way to manage a renovation is to break it into clear stages.
A well-planned renovation starts long before demolition begins. By defining your goals, inspecting the home, setting a realistic home renovation budget, creating a detailed project scope, choosing qualified professionals, and planning the construction sequence, you can reduce delays, unexpected costs, and unnecessary changes.
This guide explains how to plan a home renovation step by step, from the initial idea through construction, final inspection, and project completion.
Table of Contents
Step 1: Define Your Renovation Goals
Before researching contractors or buying materials, determine what you want the renovation to accomplish.
Start with a list of the problems you want to solve and the improvements you want to make.
For example, your goals might include:
- Updating an outdated kitchen
- Adding storage
- Repairing damaged areas
- Improving energy efficiency
- Modernizing bathrooms
- Creating a more functional floor plan
- Improving natural lighting
- Replacing worn flooring
- Updating the exterior
- Preparing the home for future needs
Try to define the desired result rather than immediately choosing specific products.
For example, instead of saying, “I need new cabinets,” you might define the goal as “I need more functional kitchen storage.”
This gives you greater flexibility when comparing different design and material options.
Step 2: Decide What to Renovate
Once your goals are clear, determine exactly which rooms and systems are included in the project.
Create two basic lists.
Included in the renovation:
- Kitchen
- Main bathroom
- Living room
- Flooring
- Lighting
Not included:
- Bedrooms
- Garage
- Landscaping
- Basement
This distinction helps prevent uncontrolled project expansion.
Renovation costs can increase quickly when additional rooms, features, or upgrades are added after construction has already started.
A clearly defined scope also makes contractor estimates easier to compare.
Step 3: Inspect the Existing Home
Before planning cosmetic improvements, understand the condition of the property.
Inspect areas and systems such as:
- Roof
- Foundation
- Plumbing
- Electrical systems
- HVAC
- Windows
- Insulation
- Flooring
- Walls and ceilings
- Moisture
- Drainage
Some problems may not be visible during a normal walkthrough.
For older homes or major renovations, a professional inspection can help identify conditions that could affect the scope, budget, or construction schedule.
This step is particularly important if you plan to open walls, remove ceilings, change the layout, or renovate kitchens and bathrooms.
Finding problems before construction begins is generally easier and less disruptive than discovering them after finished work has been installed.
Step 4: Separate Essential Repairs From Cosmetic Improvements
Not every renovation task has the same priority.
Separate your plans into three groups.
Essential Repairs
These are issues that can affect safety, structural integrity, water protection, or basic functionality.
Examples include:
- Roof leaks
- Structural damage
- Serious electrical problems
- Major plumbing leaks
- Significant moisture problems
Important Improvements
These projects may not represent immediate safety concerns but can improve comfort, efficiency, or usability.
Examples include:
- Insulation upgrades
- Window replacement
- HVAC improvements
- Better storage
- Kitchen improvements
- Lighting upgrades
Cosmetic Improvements
These include:
- Paint colors
- Decorative lighting
- Hardware
- Trim
- Decorative finishes
Cosmetic improvements are generally easier to postpone if the budget becomes tight.
Prioritizing the renovation this way helps ensure that essential problems are addressed before money is spent heavily on appearance.
Step 5: Set Your Home Renovation Budget
Once you know what you want to renovate, establish a realistic budget.
Your budget should account for more than materials and contractor labor.
Consider including:
- Materials
- Labor
- Contractor fees
- Permits
- Design services
- Demolition
- Waste disposal
- Equipment
- Appliances
- Fixtures
- Delivery costs
- Temporary accommodation
- Storage
- Contingency
Do not plan to spend every dollar you have available.
A contingency reserve of approximately 10% to 20% is a common starting point for unexpected renovation costs. Older homes, extensive renovations, and projects involving significant demolition may require a larger reserve.
Your maximum available cash should not automatically become your renovation spending target.
If the planned work already consumes everything you can comfortably afford, consider reducing the scope or completing the project in phases.
Step 6: Research Local Building Requirements
Before finalizing your renovation plans, determine which permits, inspections, and approvals may be required.
Requirements vary by location and project type.
Permits may be required for work involving:
- Structural modifications
- Electrical systems
- Plumbing
- HVAC
- Additions
- Major alterations
- Changes affecting occupancy or exits
Contact the appropriate local building authority or ask your contractor to identify the requirements that apply to your project.
Do not assume that a project is exempt from permitting simply because it is described as a renovation.
The type of work being performed matters more than the label used to describe the project.
Step 7: Create a Detailed Project Scope
A project scope describes exactly what the renovation includes.
It should identify:
- Rooms being renovated
- Work being performed
- Materials
- Fixtures
- Appliances
- Structural changes
- Electrical work
- Plumbing work
- HVAC work
- Finishing work
- Cleanup requirements
The more detailed the scope, the easier it is to obtain comparable estimates.
For example, “renovate the kitchen” is too vague.
A more useful scope could specify:
- Remove existing cabinets
- Install new base and wall cabinets
- Replace countertops
- Install backsplash
- Replace flooring
- Upgrade lighting
- Install a new sink and faucet
- Paint walls
- Install appliances
A detailed scope reduces misunderstandings and gives contractors a clearer basis for pricing the project.
Step 8: Create a Preliminary Floor Plan
If the renovation changes the layout, develop a floor plan before construction begins.
For a simple project, you may only need a basic drawing that shows:
- Room dimensions
- Wall locations
- Door locations
- Window locations
- Plumbing locations
- Electrical outlets
- Lighting
- Major appliances
- Storage areas
For structural changes, additions, or complex layouts, an architect, designer, or structural engineer may be appropriate.
A good floor plan can identify problems before they become expensive construction changes.
For example, moving a kitchen sink may affect plumbing, cabinets, flooring, electrical work, and the construction schedule.
Step 9: Choose Your Design and Materials
Decide on major materials and finishes before construction begins whenever possible.
Depending on the project, these may include:
- Flooring
- Cabinets
- Countertops
- Tile
- Paint
- Doors
- Windows
- Plumbing fixtures
- Lighting
- Appliances
- Hardware
Create a simple specification list that identifies the products and finishes you intend to use.
This helps contractors prepare more accurate estimates and reduces last-minute substitutions.
It also gives you better control over the renovation budget.
Step 10: Decide What You Will DIY
Determine which tasks you can realistically complete yourself.
DIY may be appropriate for:
- Painting
- Basic demolition
- Simple hardware installation
- Certain finishing tasks
- Some landscaping work
Professional assistance is generally more appropriate for specialized work such as:
- Electrical
- Plumbing
- Structural modifications
- Roofing
- HVAC
- Gas systems
Local regulations may also require licensed professionals for certain work.
When deciding whether to do a task yourself, consider the total cost of your time, tools, materials, mistakes, delays, and potential professional corrections.
Saving on labor is not worthwhile if a mistake creates a larger repair bill.
Step 11: Find Qualified Contractors
If your renovation requires professional work, begin researching contractors early.
Look for professionals who have experience with projects similar to yours.
Consider:
- Relevant experience
- Licensing requirements
- Insurance
- References
- Reviews
- Previous projects
- Written estimates
- Contract terms
- Warranty information
Do not select a contractor based solely on the lowest price.
A contractor who understands the project scope, communicates clearly, provides detailed documentation, and has relevant experience may offer better overall value.
Step 12: Get Multiple Detailed Estimates
Request estimates from several qualified contractors when practical.
Give each contractor the same project scope and material specifications.
This makes the estimates easier to compare.
Review whether each estimate includes:
- Labor
- Materials
- Permits
- Demolition
- Disposal
- Equipment
- Project management
- Timeline
- Payment schedule
- Warranty
If one estimate is dramatically lower than the others, ask why.
A significantly lower price may indicate that certain work, materials, or services have been excluded.
Step 13: Compare Contractors Carefully
Price is only one part of contractor selection.
Communication
Does the contractor communicate clearly and respond within a reasonable time?
Experience
Have they completed projects similar to yours?
Documentation
Is the estimate detailed enough to understand exactly what is included?
Schedule
Does the proposed timeline appear realistic?
Licensing and Insurance
Do they meet applicable local requirements?
References
Can they provide evidence of successfully completed projects?
Contract
Does the agreement clearly define the scope, price, payment schedule, responsibilities, and change-order process?
A renovation can represent a significant financial commitment, so contractor selection deserves careful evaluation.
Step 14: Finalize the Renovation Contract
Before work begins, make sure the agreement clearly explains the project.
Important contract elements may include:
- Scope of work
- Materials
- Total price
- Payment schedule
- Start date
- Estimated completion date
- Change-order procedure
- Permit responsibilities
- Cleanup responsibilities
- Warranty
- Insurance
- Dispute procedures
Do not rely on verbal promises for important project decisions.
If an agreement affects the scope, cost, schedule, materials, or responsibilities of either party, it should be documented.
Step 15: Create a Construction Schedule
A renovation should follow a logical sequence.
A simplified construction sequence may look like:
- Planning and design
- Permits and approvals
- Ordering materials
- Site preparation
- Demolition
- Structural work
- Plumbing and electrical rough-in
- HVAC work
- Insulation
- Drywall
- Flooring and other surfaces
- Cabinets and built-ins
- Fixtures and appliances
- Painting and finishing
- Final repairs
- Cleaning
- Final inspection
The exact order varies according to the project.
The main principle is to complete hidden systems and major construction before installing vulnerable finished surfaces.
For example, installing expensive finished flooring before major plumbing or electrical work is complete can expose the flooring to unnecessary damage.
Step 16: Order Materials Early
Material delays can stop an otherwise well-organized renovation.
Before construction begins, determine whether major items have long lead times.
These may include:
- Custom cabinets
- Windows
- Doors
- Appliances
- Specialty tile
- Custom countertops
- Lighting
- Plumbing fixtures
Confirm expected delivery dates before scheduling dependent work.
A construction schedule should account for the availability of materials rather than assuming every product will arrive immediately.
Step 17: Prepare the Home for Construction
Before demolition begins, prepare the property for the work.
Depending on the project, you may need to:
- Remove furniture
- Protect remaining rooms
- Move valuables
- Cover HVAC vents
- Arrange temporary storage
- Set up temporary cooking facilities
- Disconnect services when required
- Establish a construction entrance
- Protect floors and finished surfaces
If you remain in the home during construction, create a clear separation between the work area and your living space.
Good preparation can reduce dust, damage, disruption, and unnecessary cleanup.
Step 18: Plan for Living Through the Renovation
A renovation can disrupt normal household routines.
Consider how you will handle:
- Cooking
- Bathrooms
- Sleeping arrangements
- Laundry
- Pets
- Children
- Noise
- Dust
- Parking
- Access to the property
For a kitchen renovation, you may need a temporary food preparation area.
For a major whole-house renovation, temporary accommodation may be more practical.
Plan these arrangements before construction begins so that temporary living expenses do not become an unexpected addition to the budget.
Step 19: Monitor the Project and Budget
Once construction begins, continue tracking the project.
Regularly review:
- Work completed
- Upcoming work
- Material deliveries
- Contractor invoices
- Change orders
- Remaining budget
- Construction schedule
- Problems requiring decisions
Do not wait until the end of the renovation to compare actual spending with the original budget.
Early identification of cost increases gives you more opportunities to adjust the scope before the budget becomes difficult to control.
Step 20: Control Change Orders
Change orders are one of the most common ways renovation costs increase.
A change order can result from:
- Changing materials
- Changing the layout
- Adding new work
- Hidden damage
- Design changes
- Unavailable products
Not every change can be avoided.
For example, hidden structural damage may require immediate repair.
However, optional changes should be evaluated carefully.
Before approving a change, ask:
- Is it necessary?
- How much will it cost?
- Will it affect the schedule?
- Can it wait until a later renovation?
- Will it require additional permits?
This simple process can help prevent unnecessary spending during construction.
Step 21: Handle Unexpected Problems
Even a well-planned renovation can uncover hidden problems.
Common examples include:
- Water damage
- Mold
- Rot
- Outdated wiring
- Damaged pipes
- Structural problems
- Poor previous workmanship
When an unexpected problem appears, avoid making an immediate decision without understanding its implications.
Ask the contractor to explain:
- What was discovered
- Why it requires attention
- What could happen if it is not repaired
- The proposed solution
- The additional cost
- The effect on the schedule
Then determine whether the repair is essential, advisable, or optional.
This helps separate genuine construction problems from unnecessary upgrades.
Step 22: Conduct a Final Inspection
When the contractor says the work is complete, perform a detailed walkthrough before considering the project finished.
Check:
- Doors
- Windows
- Cabinets
- Flooring
- Walls
- Paint
- Fixtures
- Outlets
- Lighting
- Plumbing fixtures
- Appliances
- Trim
- Caulking
- Hardware
Create a punch list of incomplete, damaged, or defective items.
Make sure agreed work is completed and required inspections have been addressed before finalizing the project.
Step 23: Collect Project Documentation
Keep important renovation documents after the project is finished.
Save:
- Contractor contract
- Invoices
- Receipts
- Product information
- Warranties
- Permit records
- Inspection reports
- Plans
- Appliance manuals
- Paint colors
- Material specifications
These records can be useful for future repairs, maintenance, warranty claims, insurance matters, or a future home sale.
Common Home Renovation Planning Mistakes
Avoiding mistakes before construction begins can save significant time and money.
Starting Without a Clear Scope
A vague project is difficult to price, schedule, and manage.
Underestimating the Budget
Your initial estimate should not automatically be treated as the maximum amount you will spend.
Skipping an Inspection
Hidden problems can become expensive once walls, ceilings, or floors are opened.
Choosing Materials Too Late
Late decisions can create delays, substitutions, and change orders.
Choosing the Cheapest Contractor
The lowest estimate does not necessarily represent the lowest overall cost or the best value.
Changing the Design During Construction
Changes after work begins often require additional labor and materials.
Ignoring Construction Sequence
Poor sequencing can cause completed work to be damaged or repeated.
Forgetting Daily Life
A renovation affects the way your household operates. Cooking, sleeping, bathing, laundry, parking, pets, and children all need to be considered.
Spending the Entire Contingency Fund on Upgrades
A contingency reserve should primarily protect the project against genuine unexpected problems. It should not become a source of funding for optional improvements.
A Simple Home Renovation Planning Timeline
A general renovation planning timeline may look like this.
Several Months Before Construction
- Define renovation goals
- Inspect the home
- Establish a preliminary budget
- Research design options
- Determine the project scope
One to Three Months Before Construction
- Finalize plans
- Research contractors
- Request detailed estimates
- Select major materials
- Apply for applicable permits
Several Weeks Before Construction
- Sign the contract
- Order long-lead materials
- Confirm the construction schedule
- Prepare the home
- Arrange temporary accommodation if needed
- Arrange storage if necessary
During Construction
- Monitor progress
- Track expenses
- Review change orders
- Confirm material deliveries
- Resolve problems promptly
- Communicate regularly with the contractor
At Completion
- Conduct the final walkthrough
- Create and resolve the punch list
- Complete required inspections
- Collect warranties and project documents
- Make final payments according to the contract
The exact timeline varies considerably depending on the size, complexity, and location of the renovation.
Final Thoughts
Learning how to plan a home renovation step by step can make the difference between a controlled project and an expensive, stressful one.
The process begins with defining your goals and understanding the existing condition of the home. From there, establish a realistic budget, separate essential repairs from optional improvements, create a detailed scope, finalize the design, select materials, obtain required permits, and choose qualified contractors.
Once construction begins, continue monitoring the budget and schedule. Control change orders, address unexpected problems carefully, and complete a thorough final inspection before considering the project finished.
You do not need to predict every problem before construction starts. You need a planning process that gives you enough information to make sound decisions when unexpected conditions or changes arise.
The most successful renovations are not necessarily the largest or most expensive. They are projects that improve the property while remaining aligned with the homeowner’s budget, priorities, timeline, and long-term needs.
Frequently Asked Questions
What should I do first when planning a home renovation?
Start by defining your renovation goals and identifying the rooms, systems, or problems you want to address. Then inspect the existing home before finalizing the project scope and budget.
How long should I plan a home renovation before construction starts?
The planning period depends on the project’s size and complexity. A simple room update may require several weeks of preparation, while a major renovation involving structural changes, permits, design work, and multiple contractors can require several months.
Should I hire a contractor before finalizing the design?
For simple projects, you can often establish the basic scope before requesting contractor estimates. For complex renovations, involving a qualified contractor, architect, or designer early can help identify construction and cost issues before the final plans are completed.
Should I renovate one room at a time?
It depends on your budget, schedule, and how the rooms and systems are connected. Renovating related spaces together can sometimes improve efficiency, while phased renovations can make a large project easier to manage financially.
How much contingency should I include in a renovation plan?
A contingency of approximately 10% to 20% is a common starting point for many renovation projects. Older homes, major structural work, and projects involving significant demolition may justify a larger reserve.
When should I order renovation materials?
Order major materials early enough to accommodate their expected lead times. Custom cabinets, windows, doors, appliances, countertops, and specialty finishes may require more planning than standard products.
How can I avoid renovation delays?
Create a detailed project scope, finalize major decisions early, obtain required permits before applicable work begins, order long-lead materials in advance, and maintain regular communication with your contractor.
What should I do if renovation costs exceed my budget?
First identify why the cost increased. Determine whether the additional work is essential, then postpone lower-priority improvements when possible. Protect your contingency reserve for genuine unexpected problems rather than using it for optional upgrades.
Is it better to renovate all at once or in phases?
There is no universal answer. Completing related work together can reduce repeated demolition and disruption, while phasing can make a large renovation easier to finance and manage. The best approach depends on the home’s condition, project scope, budget, and construction sequence.
How do I choose the right contractor for a renovation?
Compare contractors based on relevant experience, detailed estimates, licensing and insurance requirements, references, communication, schedule, contract terms, and warranty information rather than choosing solely on price.
What should be included in a home renovation contract?
A renovation contract should clearly define the scope of work, materials, price, payment schedule, schedule expectations, change-order procedure, permit responsibilities, cleanup responsibilities, warranty terms, and other relevant responsibilities.
What is the biggest mistake to avoid when planning a renovation?
One of the biggest mistakes is starting construction without a clearly defined scope and realistic budget. Unclear plans can lead to design changes, unexpected costs, delays, and disputes once work begins.