
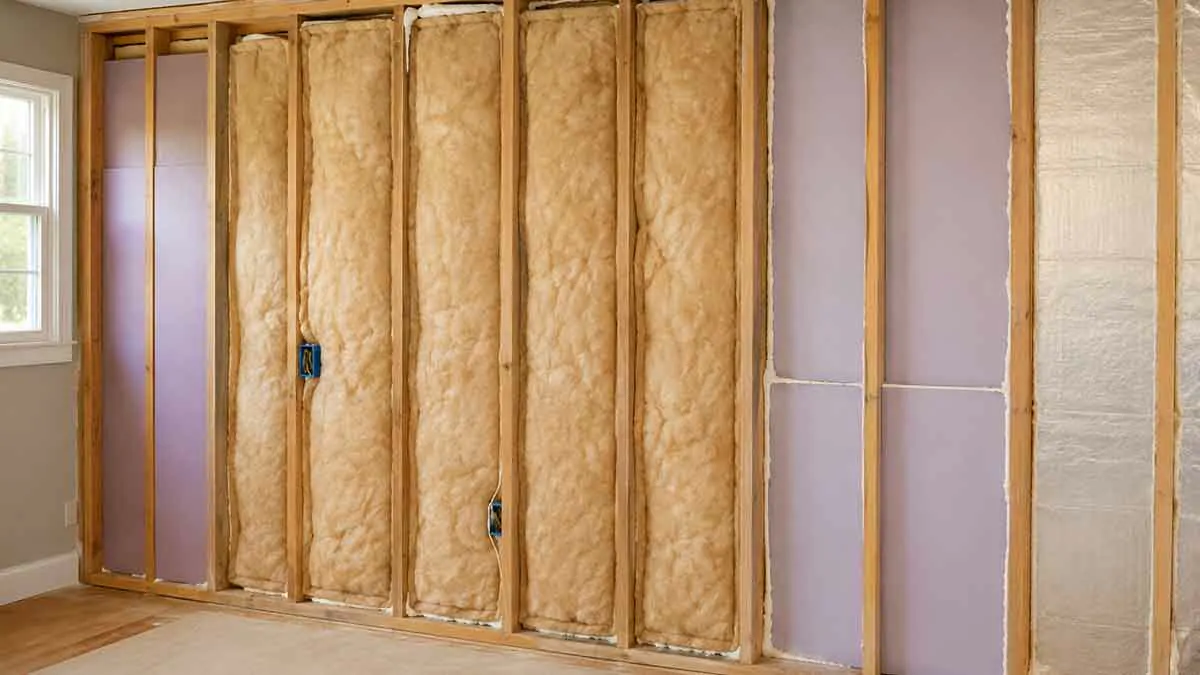
Wall insulation is an important part of a home’s building envelope. Properly insulated walls can reduce unwanted heat transfer, improve indoor comfort, and help heating and cooling systems maintain more consistent temperatures.
However, insulation is only one part of wall performance. Air leakage, thermal bridging, moisture, windows, doors, and the design of the wall assembly can all affect how well a wall performs.
The best insulation approach depends on the home’s construction, climate, existing wall assembly, available space, moisture conditions, and whether the project involves new construction or an existing home.
This wall insulation guide explains the main insulation types, retrofit options, air sealing, moisture control, R-value, common problems, and what to consider before upgrading exterior walls.
Table of Contents
What Is Wall Insulation?
Wall insulation is material installed within or around a wall assembly to reduce heat transfer between the interior and exterior of a home.
It is commonly installed in:
- Exterior wall cavities
- Interior walls
- Garage walls
- Basement walls
- Attic knee walls
- Addition walls
- New construction wall assemblies
Exterior wall insulation primarily helps reduce heat flow between conditioned indoor space and outdoor conditions.
Interior wall insulation may also be used for sound control or to separate conditioned areas from unconditioned spaces.
The insulation should be considered part of a complete wall assembly that also manages air movement, moisture, water, and heat transfer.
Why Wall Insulation Matters
Walls can represent a substantial portion of the building envelope. When insulation is missing, damaged, compressed, or poorly installed, heat can move through the wall more easily.
Proper insulation can help:
- Reduce heat transfer
- Improve indoor comfort
- Reduce temperature differences between rooms
- Reduce heating and cooling demand
- Improve temperature consistency
- Reduce cold surfaces
- Improve sound control with suitable assemblies
- Support overall building envelope performance
Insulation does not, by itself, eliminate drafts. Significant air leakage can bypass insulation, which is why air sealing should be considered alongside insulation improvements.
Signs Your Walls Need More Insulation
It is not always possible to determine wall insulation problems simply by touching a wall, but several signs can justify further investigation.
Potential indicators include:
- Exterior walls feel unusually cold during winter.
- Rooms become excessively warm during summer.
- Some rooms are consistently harder to heat or cool.
- Heating or cooling demand appears unusually high.
- Electrical outlets on exterior walls feel noticeably cold.
- Drafts occur around wall penetrations.
- Renovated walls may contain incomplete insulation.
- Older walls have unknown insulation conditions.
- Interior surfaces develop unusual cold spots.
These symptoms can also be caused by air leakage, inefficient windows, HVAC problems, or moisture issues.
A professional energy assessment can help determine whether wall insulation is actually a major source of the problem.
How to Check Existing Wall Insulation
Determining what is inside an existing wall can be difficult without accessing the wall cavity.
Possible methods include:
- Reviewing construction records
- Inspecting accessible areas
- Checking during remodeling
- Creating small inspection openings
- Using specialized inspection equipment
- Hiring an energy professional
Do not assume an older home has no insulation. Many older walls contain some insulation, but it may be incomplete, settled, compressed, damaged, or poorly fitted.
Before adding insulation, it is important to understand the existing wall assembly whenever possible.
Types of Wall Insulation
Several insulation materials can be used in residential wall assemblies.
Common options include:
- Fiberglass batts
- Mineral wool
- Cellulose
- Blown-in insulation
- Rigid foam
- Spray foam
Each material has different thermal, moisture, fire, installation, and cost characteristics.
The best choice depends on the wall assembly and installation conditions rather than simply selecting the insulation with the highest advertised R-value.
Fiberglass Batt Insulation
Fiberglass batts are widely used in framed wall cavities.
They are manufactured in standard dimensions designed to fit between common stud spacing.
Potential advantages include:
- Relatively affordable
- Widely available
- Familiar installation methods
- Suitable for many framed wall assemblies
- Available in different R-values
Fiberglass performs best when it fits the cavity properly without significant gaps or compression.
Poor installation can leave voids around electrical boxes, pipes, corners, and framing members.
Mineral Wool Insulation
Mineral wool is available in batt and board products designed for different building applications.
Potential benefits include:
- Good thermal performance
- Useful sound-control characteristics
- Fire-resistant properties
- Rigid or semi-rigid forms that can fit tightly into cavities
- Resistance to moisture absorption in many products
Mineral wool still needs proper installation and should be selected according to the requirements of the wall assembly.
Cellulose Insulation
Cellulose insulation is commonly produced from processed plant fiber and is often used in retrofit wall applications.
It can be installed using techniques such as dense packing to fill enclosed wall cavities.
Potential benefits include:
- Good cavity coverage
- Ability to fill irregular spaces
- Useful retrofit applications
- Recycled content in many products
The installation technique is important because inadequate density or incomplete filling can leave voids inside the wall.
Blown-In Wall Insulation
Blown-in insulation can be useful when upgrading existing walls without removing the entire interior finish.
An installer may create controlled access openings and inject insulation into wall cavities.
Potential advantages include:
- Reduced demolition compared with opening entire walls
- Ability to retrofit existing cavities
- Good coverage when properly installed
- Compatibility with certain older wall assemblies
Before using blown-in insulation, the installer should identify obstacles such as wiring, plumbing, fire blocking, and cavity configuration.
Rigid Foam Insulation
Rigid foam boards can be used within wall assemblies or as continuous insulation on the exterior side of a wall.
One major advantage of exterior rigid foam is that a continuous layer can reduce some thermal bridging through framing.
Potential benefits include:
- High thermal resistance for some products
- Continuous insulation
- Reduced thermal bridging
- Consistent coverage
However, rigid foam products differ in moisture permeability, fire characteristics, attachment requirements, and permitted uses.
Exterior foam also affects siding, windows, trim, flashing, and overall wall thickness, so the complete assembly should be planned before installation.
Spray Foam Insulation
Spray foam can provide insulation while also helping reduce air leakage.
It may be used in:
- Irregular wall cavities
- Difficult-to-seal areas
- Rim joists
- Certain retrofit applications
- New construction wall assemblies
Different spray foam products have different expansion characteristics and performance properties.
Potential disadvantages include:
- Higher cost
- More complicated installation
- Special fire-protection requirements in some applications
- Difficulty removing the material later
- Greater sensitivity to installation quality
Large spray foam projects are often better handled by qualified installers.
Insulating Existing Walls
Retrofitting insulation into an existing wall is generally more complicated than insulating an open wall during construction.
Depending on the building, options may include:
- Removing interior finishes
- Accessing cavities from the exterior
- Drilling controlled injection holes
- Removing sections of siding
- Installing blown-in insulation
- Rebuilding portions of the wall
The least disruptive approach depends on the existing siding, interior finishes, framing, insulation, and wall assembly.
Before drilling or cutting into a wall, identify electrical wiring, plumbing, structural elements, and other hidden components.
Wall Insulation During New Construction
New construction provides the greatest opportunity to design insulation, air sealing, and moisture control as one system.
A wall assembly may include:
- Cavity insulation
- Continuous exterior insulation
- An air-control layer
- A water-resistive barrier
- Appropriate vapor control
- Flashing
- Exterior cladding
- Thermal-bridge reduction measures
Planning these components together can produce a more durable and efficient wall than treating insulation as a standalone product.
Exterior Wall Insulation
Exterior insulation can be installed outside the structural wall and beneath the exterior cladding.
This can create a more continuous thermal layer across portions of the wall.
Potential benefits include:
- Reduced thermal bridging
- More continuous insulation
- Improved thermal performance
- Opportunity to upgrade insulation during exterior renovations
However, exterior insulation can affect:
- Siding installation
- Window and door detailing
- Flashing
- Trim
- Fastener length
- Wall thickness
- Exterior drainage
These details should be addressed as part of the complete exterior renovation.
Interior Wall Insulation
Interior insulation may be appropriate during major remodeling or when exterior access is impractical.
A typical project may involve:
- Removing the existing wall finish.
- Inspecting the framing and wall cavity.
- Correcting moisture problems.
- Addressing air leaks.
- Installing compatible insulation.
- Completing required air and vapor control.
- Installing the interior wall finish.
Interior insulation can reduce usable room dimensions slightly and may require relocating electrical outlets, switches, trim, and other components.
Air Sealing and Wall Insulation
Air sealing and insulation perform different functions.
Insulation slows heat transfer.
Air sealing reduces uncontrolled movement of air through gaps and openings.
Potential air leakage locations include:
- Electrical outlets
- Switch boxes
- Plumbing penetrations
- Wiring penetrations
- Window openings
- Door openings
- Rim joists
- Gaps between framing and sheathing
A wall with high-quality insulation can still perform poorly if air is able to move around or through the insulation.
For this reason, air sealing should be considered whenever wall insulation is installed or upgraded.
Thermal Bridging
Thermal bridging occurs when heat travels through portions of a wall that have lower thermal resistance than the surrounding insulation.
Framing members are common thermal bridges.
For example, insulation placed between wood studs does not completely eliminate heat flow through the studs.
Continuous insulation can reduce some of this heat flow by creating an additional thermal layer across the framing.
The amount of improvement depends on the complete wall assembly, insulation placement, framing density, and climate.
Wall Insulation and Moisture
Moisture is one of the most important considerations when upgrading wall insulation.
Water can enter wall assemblies through:
- Roof leaks
- Window leaks
- Door openings
- Damaged siding
- Plumbing leaks
- Foundation areas
- Condensation
Do not install insulation over an unresolved moisture problem.
Wet insulation and trapped moisture can contribute to deterioration, odors, mold growth, and damage to framing.
Before insulating, identify the source of moisture and determine how the wall assembly will manage both liquid water and water vapor.
Vapor Control
Vapor control and air sealing are not the same thing.
An air barrier limits air movement, while a vapor-control layer manages water vapor movement through the wall assembly.
The appropriate vapor-control strategy depends on factors such as:
- Climate
- Wall construction
- Insulation type
- Interior finishes
- Exterior materials
- Moisture exposure
Do not automatically install an impermeable vapor barrier on every wall.
A wall assembly that is not appropriate for its climate and moisture conditions can trap moisture and create long-term problems.
Windows, Doors, and Wall Insulation
Even well-insulated walls can perform poorly if windows and exterior doors have significant air leaks.
When upgrading wall insulation, inspect the areas around:
- Window frames
- Door frames
- Exterior trim
- Flashing
- Interior and exterior sealants
Look for gaps, deteriorated caulk, missing insulation, or signs of water intrusion.
The connection between the wall and window or door should be treated as part of the overall building envelope.
Electrical Outlets and Wall Insulation
Electrical outlets and switches installed on exterior walls can be potential air leakage points.
Appropriate air-sealing methods may be used depending on the electrical box design and applicable safety requirements.
However, electrical components should not be modified in a way that creates a fire, electrical, or overheating hazard.
If wiring appears damaged or the correct sealing method is unclear, have the work evaluated by a qualified electrician.
Soundproofing vs Thermal Insulation
Thermal insulation and soundproofing are related but different goals.
Some wall insulation materials can reduce sound transmission, but effective sound isolation usually depends on the complete wall assembly.
Additional measures may include:
- Suitable cavity insulation
- Additional drywall layers
- Resilient channels or other decoupling methods
- Sealed penetrations
- Improved door and window seals
- Specialized acoustic materials
If sound control is the primary objective, evaluate the complete assembly rather than choosing insulation based only on its thermal rating.
Understanding Wall Insulation R-Value
R-value measures resistance to heat flow under specified test conditions.
A higher insulation R-value generally indicates greater resistance to heat transfer.
However, the R-value printed on an insulation product does not represent the entire performance of a finished wall.
Actual wall performance is also affected by:
- Framing
- Thermal bridging
- Air leakage
- Installation quality
- Moisture
- Windows and doors
- Exterior materials
- Wall assembly design
The appropriate insulation level depends on the climate, construction type, energy requirements, and applicable building standards.
Common Wall Insulation Mistakes
Leaving Gaps
Gaps around insulation can create weak areas where heat moves more easily.
Compressing Batt Insulation
Batts should fit the cavity properly rather than being forced into spaces that are too small.
Ignoring Air Leakage
Air can bypass insulation through cracks, penetrations, and gaps in the air-control layer.
Insulating Damp Walls
Moisture problems should be resolved before insulation is installed.
Using an Incompatible Wall Assembly
Insulation must work with the wall’s moisture, air, and vapor-control strategy.
Blocking Drainage Paths
Do not obstruct intentional drainage pathways that allow water to escape from the wall assembly.
Ignoring Thermal Bridging
Cavity insulation does not completely eliminate heat transfer through framing.
Adding Insulation Without Understanding the Existing Wall
Retrofit work can create problems if the existing wall assembly is unknown or contains moisture damage.
DIY vs Professional Wall Insulation
Some insulation work may be suitable for experienced homeowners when wall cavities are completely accessible and the assembly is straightforward.
Professional assistance is more appropriate when:
- Existing walls require retrofit insulation.
- Spray foam is being installed.
- Moisture problems are present.
- Exterior insulation requires siding removal.
- Electrical or plumbing systems are involved.
- The wall assembly is complicated.
- Structural deterioration is discovered.
- The appropriate vapor-control strategy is uncertain.
Older homes deserve particular attention because their existing wall assemblies may differ significantly from modern construction.
How Much Does Wall Insulation Cost?
Wall insulation costs vary considerably depending on the project.
Important cost factors include:
- Total wall area
- Insulation material
- Existing insulation
- Wall accessibility
- Labor
- Interior finish removal
- Siding removal
- Air sealing
- Moisture repairs
- Framing modifications
- Window and door detailing
Retrofit insulation can cost more per square foot than insulating an open wall because additional access, preparation, and finish repairs may be required.
For a meaningful estimate, compare the complete project scope rather than the insulation material price alone.
How to Maintain Wall Insulation
Properly installed wall insulation generally requires little routine maintenance.
However, inspect the wall assembly when carrying out other home maintenance.
Look for:
- Water stains
- Mold
- Damaged siding
- Cracked exterior finishes
- Window leaks
- Door leaks
- Pest damage
- Persistent cold spots
- Drafts
If moisture enters the wall cavity, identify and repair the source before replacing or adding insulation.
Wall Insulation Checklist
Use this checklist when planning a wall insulation project:
- Identify the wall construction.
- Determine whether insulation already exists.
- Inspect for moisture problems.
- Check windows and exterior doors.
- Identify significant air leaks.
- Inspect electrical and plumbing penetrations.
- Consider thermal bridging.
- Select insulation compatible with the wall assembly.
- Determine an appropriate insulation level.
- Plan air sealing.
- Evaluate vapor and moisture control.
- Protect intentional drainage pathways.
- Consider fire-protection requirements.
- Follow applicable building requirements.
- Inspect the completed installation.
When to Hire a Professional
Professional assistance is recommended when:
- You cannot determine the existing wall assembly.
- The wall has persistent moisture problems.
- There is visible mold or structural deterioration.
- Extensive retrofit insulation is required.
- Spray foam is being considered.
- Exterior insulation requires major siding work.
- Electrical or plumbing systems complicate the project.
- The wall requires significant changes to its moisture-control strategy.
A qualified insulation contractor, energy professional, building contractor, or other specialist can evaluate the wall as a complete assembly rather than focusing only on insulation thickness.
Final Thoughts
Wall insulation is an important component of a comfortable and energy-efficient home, but adding insulation alone does not guarantee good wall performance.
The best results come from treating the wall as a complete building-envelope system. Appropriate insulation should work together with air sealing, moisture management, vapor control, windows, doors, exterior drainage, and thermal-bridge reduction.
For an existing home, start by determining what insulation is already present and identifying the main sources of heat loss or air leakage. For new construction or major renovations, design the insulation and control layers together before construction begins.
A properly designed and installed wall insulation system can reduce unwanted heat transfer, improve indoor comfort, and contribute to the long-term durability and performance of the home.