
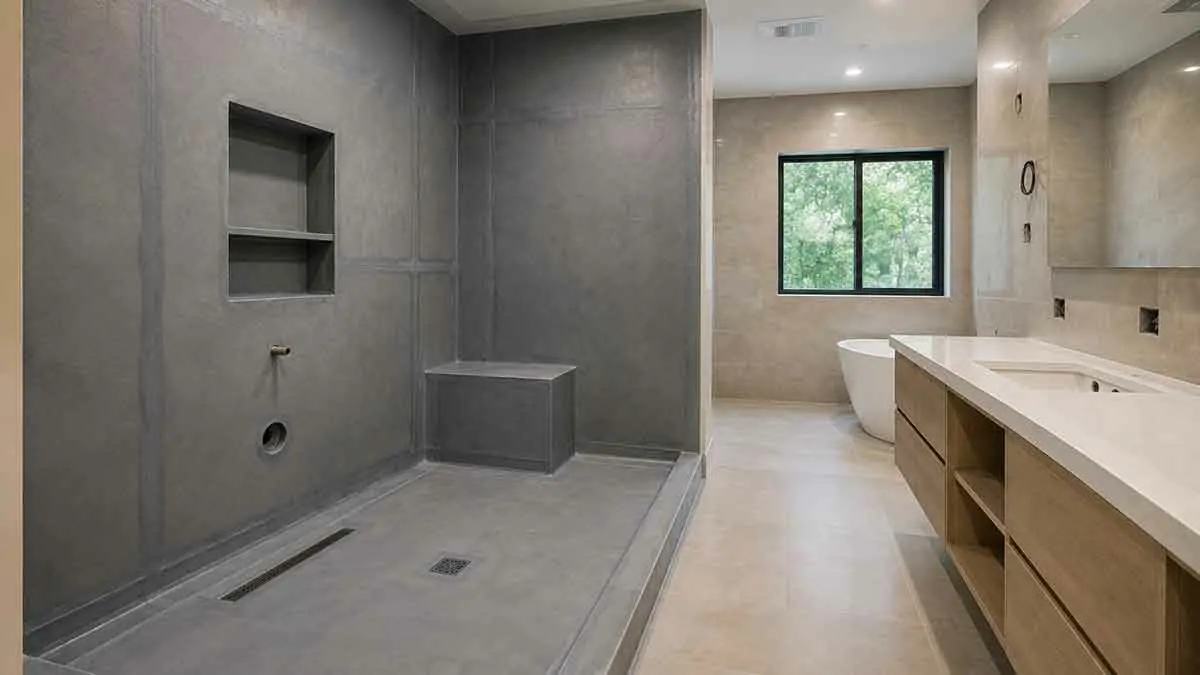
Bathroom waterproofing is one of the most important parts of a successful bathroom renovation or new construction project. Bathrooms are exposed to water and moisture every day, especially around showers, bathtubs, floors, sinks, and other wet areas.
A bathroom can look completely finished while still having a serious moisture problem hidden behind the walls or beneath the floor. If water reaches framing, subfloors, insulation, or other building components, it can lead to deterioration, unpleasant odors, mold growth, and costly repairs.
Proper bathroom waterproofing helps prevent water from penetrating vulnerable parts of the building assembly. It works together with proper drainage, sealing, ventilation, and moisture-resistant finishes to create a durable bathroom.
This complete guide explains what bathroom waterproofing is, where it is needed, how shower waterproofing works, the most common waterproofing systems and materials, mistakes to avoid, and how to plan waterproofing during a bathroom renovation.
Table of Contents
What Is Bathroom Waterproofing?
Bathroom waterproofing is the process of creating a system that limits water penetration into areas of the building that are not designed to remain wet.
In wet areas such as showers, waterproofing is typically installed behind or beneath the finished surface. Depending on the construction system, it may include:
- Sheet waterproofing membranes
- Liquid-applied waterproofing membranes
- Waterproof backer boards or panels
- Sealed joints and transitions
- Waterproofing tapes
- Prefabricated corners
- Pipe penetration seals
- Shower drains and compatible waterproofing connections
The exact system depends on the products being used and the construction method.
One of the most important concepts to understand is that the visible bathroom finish is not necessarily the waterproofing layer. Tile, grout, stone, and similar materials can allow some moisture to pass through joints or small imperfections.
The waterproofing system behind the finish is therefore an essential part of the assembly.
Why Bathroom Waterproofing Is Important
Bathrooms generate substantial moisture and receive direct water exposure.
If water gets behind finished surfaces, it can eventually damage materials that are not designed for continuous moisture exposure.
Potential problems include:
- Damaged subfloors
- Deteriorated framing
- Swollen materials
- Mold growth
- Staining
- Peeling finishes
- Damaged insulation
- Structural deterioration
- Expensive repairs
Good waterproofing helps protect the building structure and reduce the likelihood that routine bathroom use will create hidden moisture damage.
Waterproofing is particularly important in showers because these areas receive repeated direct water exposure.
Where Is Bathroom Waterproofing Needed?
The amount and type of waterproofing required depend on the bathroom design, construction system, and applicable local requirements.
Areas that commonly require careful moisture protection include:
- Shower floors
- Shower walls
- Bathtub surrounds
- Bathroom floors where required
- Shower niches
- Shower benches
- Drain connections
- Plumbing penetrations
- Wet-area transitions
- Areas around tubs and other water sources
The shower is generally the most demanding area because it combines frequent water exposure with multiple corners, joints, penetrations, and drainage details.
Waterproofing vs. Water-Resistant Materials
Waterproofing and water resistance are not the same.
A water-resistant material may resist moisture or slow water absorption, but it does not necessarily create a continuous waterproof barrier.
A waterproofing system is designed to control water penetration through a coordinated assembly.
For example, a tile surface can be highly resistant to water, but moisture can still reach the substrate through:
- Grout joints
- Cracks
- Movement joints
- Unsealed penetrations
- Failed sealants
- Edges and transitions
This is why the complete assembly matters more than the appearance of the finished surface.
Does Bathroom Tile Make a Wall Waterproof?
No. Tile should not automatically be considered the waterproofing system.
Tile provides a durable and attractive finished surface, but water can potentially move through joints, cracks, penetrations, and other openings.
In a shower, an appropriate waterproofing system should be installed behind or beneath the finished surface according to the selected system’s installation requirements.
The same principle applies to stone and other decorative wall finishes.
Shower Waterproofing
Shower waterproofing is one of the most critical parts of bathroom construction.
A properly designed shower waterproofing system should protect the areas exposed to water, including:
- Shower walls
- Shower floor
- Corners
- Niches
- Bench surfaces
- Drain connections
- Plumbing penetrations
- Wall-to-floor transitions
The waterproofing layer should form a continuous system rather than a collection of unrelated patches.
This is especially important around transitions and penetrations, where water can find small pathways into the underlying structure.
Shower Wall Waterproofing
Shower walls receive repeated water exposure and should be constructed using a suitable moisture-management system.
Common approaches include:
- Sheet membranes
- Liquid-applied membranes
- Waterproof backer boards
- Waterproof wall panels
- Integrated shower systems
The selected system must be installed according to its manufacturer’s instructions.
Corners, seams, fasteners, plumbing penetrations, and transitions should receive the specific treatment required by the system.
Shower Floor Waterproofing
The shower floor requires careful coordination between waterproofing and drainage.
A properly constructed shower floor should provide:
- A suitable waterproofing layer
- Appropriate slope toward the drain
- Correct drain integration
- Properly sealed transitions
- Compatible finished materials
Waterproofing alone does not make a shower floor effective. Water must also have a reliable path toward the drain.
Shower Pan Waterproofing
A shower pan is the water-management assembly beneath the finished shower floor.
Depending on the design, it may consist of:
- A sheet membrane system
- A liquid-applied membrane
- A prefabricated shower tray
- A manufactured waterproof shower base
- Another approved waterproofing assembly
The pan and drain must be designed to work together.
The waterproofing system should be installed according to the manufacturer’s requirements, particularly around seams, corners, penetrations, and the drain connection.
Waterproofing a Walk-In Shower
Walk-in showers can create a more open appearance, but they require careful water management.
The design should account for:
- Shower floor slope
- Drain location
- Waterproof walls
- Waterproof floor
- Water spray patterns
- Shower opening
- Threshold or curbless transition
- Waterproof corners
- Niches and benches if included
A walk-in shower should be designed so water remains within the intended wet area.
Waterproofing a Curbless Shower
Curbless showers provide a seamless transition between the bathroom floor and shower floor.
However, eliminating the curb reduces the physical barrier that normally helps contain water.
The design therefore needs careful coordination of:
- Floor elevation
- Shower dimensions
- Drainage
- Waterproofing continuity
- Floor slope
- Shower screen or enclosure
- Water spray patterns
Because the bathroom and shower floors may be close to the same elevation, construction tolerances and drainage become particularly important.
Shower Waterproofing Membrane
A waterproofing membrane creates a barrier that helps prevent water from reaching the substrate and building structure.
Two common membrane types are sheet membranes and liquid-applied membranes.
Sheet Waterproofing Membrane
Sheet membranes are manufactured waterproofing materials installed over a suitable substrate.
Potential advantages include:
- Consistent material thickness
- Predictable coverage
- Efficient installation
- Suitable treatment of large areas
However, seams, corners, penetrations, and transitions must be installed correctly.
Liquid Waterproofing Membrane
Liquid membranes are applied to the substrate and cure into a continuous waterproof layer.
They can be useful for:
- Irregular surfaces
- Corners
- Complex shapes
- Detailed areas
- Shower walls and floors where the system permits
Application thickness is important. The product must be applied according to the manufacturer’s specified coverage and thickness requirements.
Waterproof Backer Board
Some backer boards and wall panels are specifically manufactured as components of waterproof shower systems.
These products can simplify construction by combining substrate and moisture-management functions.
However, the board itself is only one part of the system.
Joints, corners, fasteners, penetrations, and transitions must still be treated using compatible components.
Always follow the complete system’s installation instructions.
Cement Board and Waterproofing
Cement board is commonly used as a tile substrate in bathrooms.
However, standard cement board should not automatically be considered a waterproofing membrane.
Depending on the specific product and assembly, an additional waterproofing layer may be required.
The important distinction is between:
- A suitable tile substrate
- A water-resistant material
- A complete waterproofing system
These are not necessarily the same thing.
Waterproofing a Bathroom Floor
Bathroom floors can experience water from spills, plumbing leaks, overflowing fixtures, cleaning, and splashes.
The waterproofing requirements depend on the construction assembly and local regulations.
Particular attention should be given to:
- Shower areas
- Bathtub areas
- Floor drains
- Plumbing penetrations
- Toilet areas
- Wet-area transitions
Waterproofing should be coordinated with the flooring system so that water cannot easily migrate into vulnerable areas.
Waterproofing Around a Bathtub
Bathtubs can expose surrounding walls and floors to considerable amounts of water.
The waterproofing design should account for:
- The tub surround
- Wall-to-tub transitions
- Corners
- Plumbing penetrations
- Areas exposed to splashing
If the bathtub is also used as a shower, the surrounding walls should be treated as a shower wet area.
Bathtub Shower Waterproofing
A bathtub-shower combination requires waterproofing around the areas exposed to shower spray.
Possible finished surfaces include:
- Ceramic tile
- Porcelain tile
- Waterproof wall panels
- Manufactured shower surrounds
Regardless of the visible finish, the underlying moisture-management system should be appropriate for the application and continuously connected around corners and penetrations.
Waterproofing Around Bathroom Fixtures
Fixtures create openings and transitions that can become potential weak points.
Pay attention to:
- Shower valves
- Showerheads
- Tub faucets
- Wall-mounted fixtures
- Plumbing penetrations
- Sink connections
- Toilet areas
Penetrations should be treated using components compatible with the selected waterproofing system.
Ordinary caulk should not be assumed to replace a properly designed waterproofing detail.
Waterproofing a Shower Niche
A shower niche provides convenient storage but introduces several additional surfaces and corners.
The niche should be incorporated into the waterproofing system.
Important areas include:
- Back wall
- Side walls
- Top
- Bottom
- Corners
- Niche opening
- Wall transitions
The bottom of the niche should be designed with appropriate drainage or slope so water does not remain unnecessarily against vulnerable surfaces.
Waterproofing a Shower Bench
A built-in shower bench creates another horizontal surface where water can collect.
The bench should have:
- Appropriate slope
- Continuous waterproofing
- Properly treated corners
- Waterproof transitions
- Compatible finished materials
The waterproofing system should extend across the entire bench assembly rather than stopping at the wall.
Waterproofing Corners and Plumbing Penetrations
Corners and penetrations require special attention because they interrupt large, continuous surfaces.
Waterproofing systems may use:
- Reinforcing tape
- Prefabricated corners
- Pipe seals
- Compatible sealants
- Membrane accessories
Use components designed to work with the selected waterproofing system whenever possible.
Avoid combining unrelated products without verifying compatibility.
Bathroom Waterproofing at the Drain
The drain is one of the most important details in a shower waterproofing system.
The membrane must connect correctly to the drain assembly so water cannot easily pass beneath the waterproofed surface.
Problems at the drain can undermine an otherwise well-installed shower.
The drain and membrane should therefore be treated as a coordinated system rather than separate components.
Bathroom Waterproofing and Floor Slope
Waterproofing and drainage perform different functions.
Waterproofing limits water penetration.
Slope directs water toward the drain.
A waterproof shower floor can still have drainage problems if the surface is poorly sloped.
The required slope should follow applicable standards and the requirements of the selected shower system.
Waterproofing Bathroom Walls Before Tiling
A typical shower wall preparation process may include:
- Preparing the framing and substrate.
- Installing the appropriate backer or waterproofing system.
- Treating seams and corners.
- Sealing penetrations.
- Connecting waterproofing transitions.
- Inspecting the completed waterproofing.
- Installing tile or another approved finish.
The exact sequence varies by product and construction method.
The manufacturer’s installation instructions should take precedence over generic procedures.
Can You Waterproof Over Existing Tile?
In some situations, a waterproofing system may be installed over an existing surface, but this is highly dependent on the specific system and existing conditions.
Before doing so, evaluate:
- Structural condition
- Surface stability
- Existing moisture damage
- Adhesion
- Cleanliness
- Compatibility
- Added thickness
- Drain and fixture elevations
If the existing waterproofing has failed, simply covering the finished surface does not necessarily solve the underlying problem.
A failed or damaged assembly may need to be removed and rebuilt.
Bathroom Waterproofing During a Renovation
A bathroom renovation is an excellent opportunity to inspect existing moisture protection.
If walls or floors are being opened, check for:
- Water stains
- Soft framing
- Damaged subfloors
- Mold
- Corrosion
- Failed sealants
- Previous leaks
- Deteriorated materials
If the existing waterproofing system is inadequate or damaged, correct the problem before installing new finishes.
It is usually far easier to address waterproofing while the walls and floors are accessible than after the bathroom has been completed.
Bathroom Waterproofing for New Construction
New construction allows the waterproofing system to be planned from the beginning.
Before construction starts, consider:
- Shower dimensions
- Wet zones
- Drain locations
- Floor elevations
- Plumbing penetrations
- Niches
- Benches
- Waterproofing transitions
- Tile layout
Coordination between framing, plumbing, waterproofing, and tile installation can prevent conflicts and reduce the risk of hidden moisture problems.
Bathroom Waterproofing Materials
Common waterproofing products and systems include:
- Sheet membranes
- Liquid-applied membranes
- Waterproof backer boards
- Waterproof wall panels
- Prefabricated shower trays
- Waterproofing tapes
- Sealants
- Pipe seals
- Prefabricated corners
- Compatible drain components
Whenever possible, use components that are designed and tested to work together as a system.
Liquid Waterproofing Membrane
Liquid waterproofing membranes are applied directly to an appropriate substrate.
After curing, they form a continuous waterproof layer.
Potential advantages include:
- Flexible application
- Easy coverage of irregular areas
- Useful around complex shapes
- No large sheet seams
However, installation quality is critical.
The membrane must be applied at the manufacturer’s required thickness and coverage. Applying insufficient material can compromise the waterproofing system.
Sheet Waterproofing Membrane
Sheet membranes provide a manufactured waterproofing layer.
They are installed over a suitable substrate and connected at seams, corners, penetrations, and transitions.
Potential advantages include:
- Consistent thickness
- Predictable material properties
- Efficient installation
- Good coverage of large surfaces
The seams and details are critical to the performance of the finished system.
Waterproofing Sealants and Tape
Waterproofing systems often use specialized tapes, sealants, and accessories at seams and transitions.
These products may be used around:
- Corners
- Joints
- Pipe penetrations
- Wall-to-floor transitions
- Membrane seams
- Fixture openings
Not every sealant or tape is compatible with every membrane.
Use the products specified by the waterproofing system whenever possible.
Bathroom Waterproofing Cost Factors
Bathroom waterproofing costs vary significantly depending on the project.
Important factors include:
- Bathroom size
- Shower size
- Waterproofing system
- Labor
- Existing conditions
- Surface preparation
- Drain configuration
- Shower niches
- Bench construction
- Curbless design
- Floor preparation
- Plumbing modifications
A basic shower with standard dimensions can be considerably simpler than a custom wet room with multiple waterproofed surfaces and complex drainage.
Waterproofing should therefore be evaluated as part of the complete bathroom renovation rather than as a standalone material cost.
Is Bathroom Waterproofing Worth It?
Yes.
Waterproofing is usually hidden after construction, but it protects the parts of the bathroom that are much more expensive and difficult to repair.
Replacing a damaged finish is inconvenient.
Repairing deteriorated framing, subfloors, insulation, or concealed building components can be far more disruptive and expensive.
For this reason, waterproofing should be considered a fundamental part of a bathroom renovation rather than a decorative upgrade.
Common Bathroom Waterproofing Mistakes
Treating Tile as Waterproofing
Tile is a finish, not automatically a complete waterproofing system.
Assuming Cement Board Is Completely Waterproof
Standard cement board may provide a suitable substrate without being a complete waterproofing membrane.
Ignoring Corners
Corners need continuous and compatible waterproofing treatment.
Failing to Seal Penetrations
Pipe and fixture openings can become pathways for water.
Poor Drain Integration
The membrane must connect properly to the drain assembly.
Creating an Inadequate Shower Slope
Standing water can increase moisture exposure and create drainage problems.
Applying Liquid Membrane Too Thinly
Liquid systems must be installed at the specified thickness.
Mixing Incompatible Products
Waterproofing components should be compatible with one another.
Skipping Surface Preparation
Dust, debris, movement, or an unsuitable substrate can compromise installation.
Covering Existing Moisture Damage
A new finish cannot fix an unresolved leak or deteriorated structure.
Relying Only on Caulk
Caulk has specific applications but should not be treated as a substitute for a complete waterproofing system.
How to Waterproof a Bathroom Shower
The exact installation process depends on the selected system, but a typical workflow includes the following stages.
Step 1: Inspect the Structure
Make sure the framing and substrate are sound, stable, and properly prepared.
Step 2: Prepare the Substrate
Install the appropriate substrate according to the waterproofing system.
Step 3: Plan the Details
Before waterproofing, identify:
- Corners
- Seams
- Plumbing penetrations
- Niches
- Benches
- Drain location
- Wall-to-floor transitions
Step 4: Install the Waterproofing System
Apply or install the selected membrane or waterproof panel system according to its instructions.
Step 5: Treat Seams and Corners
Use the required tape, sealant, membrane accessories, or prefabricated components.
Step 6: Seal Penetrations
Treat plumbing and fixture openings using compatible components.
Step 7: Waterproof the Shower Floor
Create the appropriate floor assembly and connect the waterproofing correctly to the drain.
Step 8: Waterproof Niches and Benches
Ensure every additional surface is incorporated into the continuous waterproofing system.
Step 9: Inspect the Waterproofing
Check coverage, seams, corners, penetrations, transitions, and drain connections before covering the system.
Step 10: Install the Finished Surface
Only after the waterproofing system has been correctly completed should tile or another approved finish be installed.
Shower Waterproofing Test
Some shower waterproofing systems can be tested for water tightness before the finished surface is installed.
A flood test may be appropriate for certain shower floor assemblies and can help identify leaks before tile is installed.
However, testing methods and requirements vary by system and location.
Follow the waterproofing manufacturer’s instructions and applicable building standards rather than assuming the same test applies to every product.
Bathroom Waterproofing Inspection
Waterproofing should ideally be inspected before it is covered by tile or another finished material.
Important areas to check include:
- Overall waterproofing coverage
- Corners
- Seams
- Penetrations
- Drain connections
- Wall-to-floor transitions
- Niches
- Bench surfaces
- Shower floor slope
The goal is to identify installation problems while they are still accessible.
Bathroom Waterproofing Maintenance
A properly installed waterproofing system is concealed, so routine maintenance focuses mainly on the finished surfaces and visible joints.
Periodically check for:
- Cracked grout
- Failed caulk
- Loose tiles
- Damaged sealants
- Persistent dampness
- Unusual staining
- Musty odors
Visible deterioration should be addressed promptly, especially around showers and tubs.
Signs of Bathroom Waterproofing Failure
Potential warning signs include:
- Loose tiles
- Persistent musty odors
- Swollen walls
- Soft flooring
- Peeling paint
- Dark or unusual staining
- Mold growth
- Water stains on ceilings below
- Damp areas outside the shower
- Persistent moisture around the bathroom
These symptoms do not automatically prove waterproofing failure because plumbing leaks, condensation, and other moisture sources can produce similar signs.
The source should be investigated before assuming the waterproofing system is responsible.
What to Do if Bathroom Waterproofing Fails
If you suspect a waterproofing problem, first determine where the moisture is coming from.
Possible sources include:
- Plumbing leaks
- Failed sealants
- Shower waterproofing failure
- Drain problems
- Condensation
- Exterior water intrusion
If water has reached the building structure, part of the assembly may need to be opened to determine the extent of the damage.
Do not simply cover visible damage with new tile or wall material.
Significant moisture damage should be evaluated by an appropriately qualified professional.
Bathroom Waterproofing and Mold Prevention
Waterproofing and ventilation address different moisture problems.
Waterproofing helps prevent liquid water from reaching vulnerable building components.
Ventilation helps remove humid air from the bathroom.
Both are important.
Mold and moisture problems can still occur when:
- Ventilation is inadequate
- Plumbing leaks exist
- Surfaces remain wet
- Waterproofing fails
- Indoor humidity remains high
A complete bathroom moisture-management strategy should address water penetration, humidity, drainage, and maintenance.
Bathroom Waterproofing vs. Bathroom Ventilation
These systems should not be confused.
Bathroom Waterproofing
Waterproofing protects building components from water penetration.
Bathroom Ventilation
Ventilation removes humid air and helps control indoor moisture and condensation.
A well-designed bathroom benefits from both.
Good ventilation cannot compensate for a failed shower waterproofing system, and waterproofing cannot remove humid air from the bathroom.
How to Plan Bathroom Waterproofing on a Budget
If the renovation budget is limited, waterproofing should not be the first area to cut.
Instead, simplify decorative elements while maintaining the essential moisture-protection system.
You can potentially control costs by:
- Choosing a standard shower layout.
- Keeping the existing plumbing where practical.
- Reducing unnecessary niches and benches.
- Choosing standard-size materials.
- Using simpler tile designs.
- Comparing waterproofing systems and installation costs.
- Avoiding unnecessary structural modifications.
Prioritize proper substrate preparation, waterproofing, drainage, and installation quality before spending more on decorative finishes.
When to Hire a Professional
Some homeowners with appropriate experience may be able to install certain waterproofing systems themselves.
Professional assistance becomes particularly valuable when the project includes:
- Curbless showers
- Complex wet rooms
- Multiple drains
- Structural modifications
- Extensive water damage
- Complicated plumbing
- Unusual floor elevations
- Large waterproofed areas
- Systems you are unfamiliar with
Waterproofing errors can remain hidden until significant damage has occurred.
If you are uncertain about the system, installation requirements, or existing moisture damage, professional evaluation can reduce the risk of costly mistakes.
Bathroom Waterproofing Checklist
Before completing a bathroom renovation, verify that:
- Wet areas have an appropriate waterproofing system.
- Shower walls are properly waterproofed.
- Shower floors are properly waterproofed.
- The waterproofing system connects correctly to the drain.
- Corners are properly treated.
- Plumbing penetrations are sealed using compatible components.
- Niches are fully waterproofed.
- Shower benches are properly waterproofed.
- Horizontal surfaces have appropriate slope where required.
- Waterproofing products are compatible.
- The waterproofing has been inspected before tiling.
- Existing moisture damage has been addressed.
- Finished joints and sealants are maintained.
- Bathroom ventilation is adequate.
Final Thoughts
Bathroom waterproofing is a fundamental part of creating a durable and reliable bathroom.
The visible tile, stone, or wall panels are only the finished surface. Behind those materials, a properly designed waterproofing system helps protect walls, floors, framing, and other building components from water penetration.
Showers, bathtub surrounds, niches, benches, drains, corners, and plumbing penetrations require particular attention because they create areas where water can reach vulnerable parts of the assembly.
Sheet membranes, liquid-applied membranes, waterproof backer boards, and prefabricated systems can all be effective when they are selected appropriately and installed according to their requirements.
The most important principle is to think of waterproofing as a complete system. The substrate, membrane, seams, corners, penetrations, drainage, slope, and finished surface must work together.
During a bathroom renovation, prioritize proper waterproofing and drainage before spending more on decorative finishes. A successful bathroom renovation should not only look good when it is finished; it should also remain protected from the water and moisture it encounters every day.